
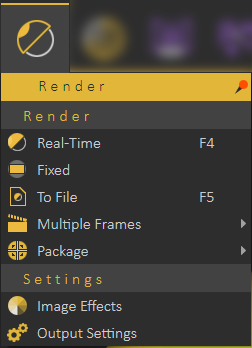
Render Menu
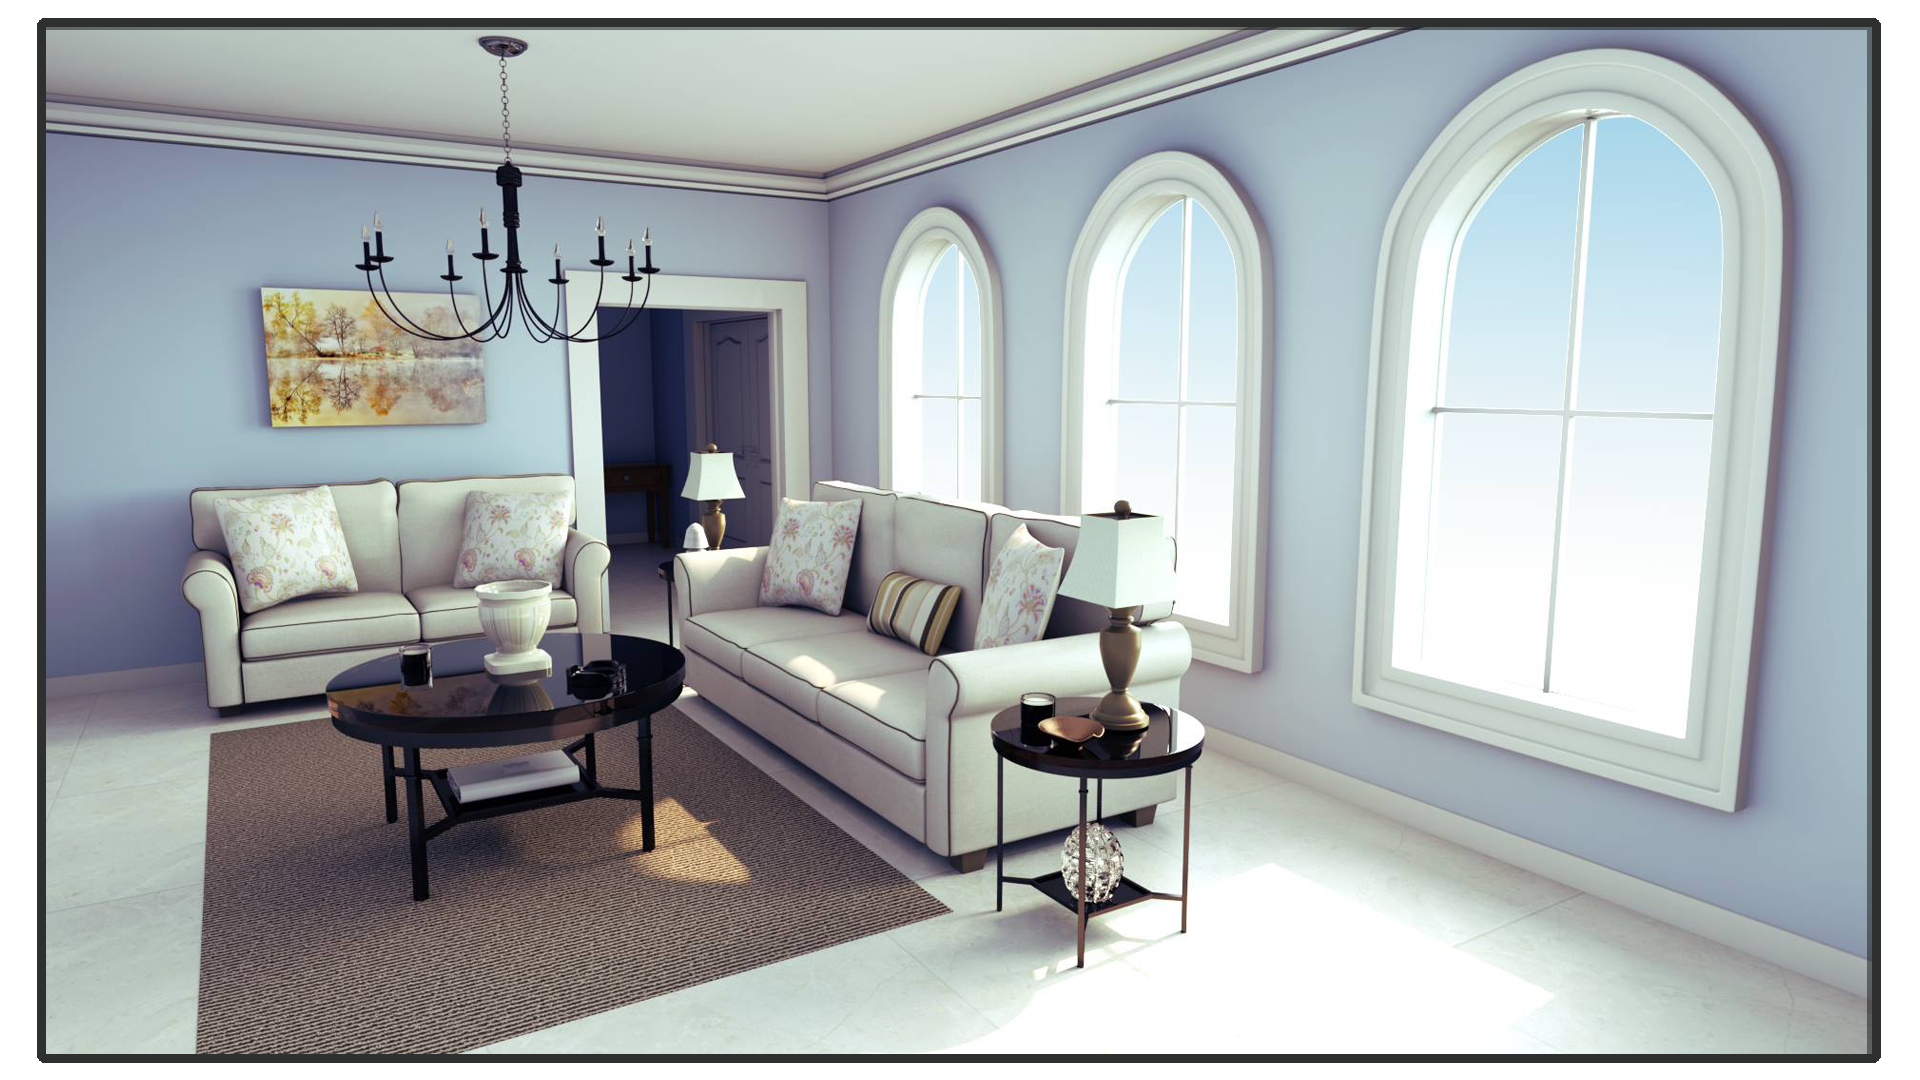
SimLab Composer Real-Time renderer (SimLab RT) is a powerful, fast, and easy-to-use real-time renderer; that has full integration with SimLab Composer. The renderer is optimally parallelized, so it can take advantage of all the CPUs available in the machine.
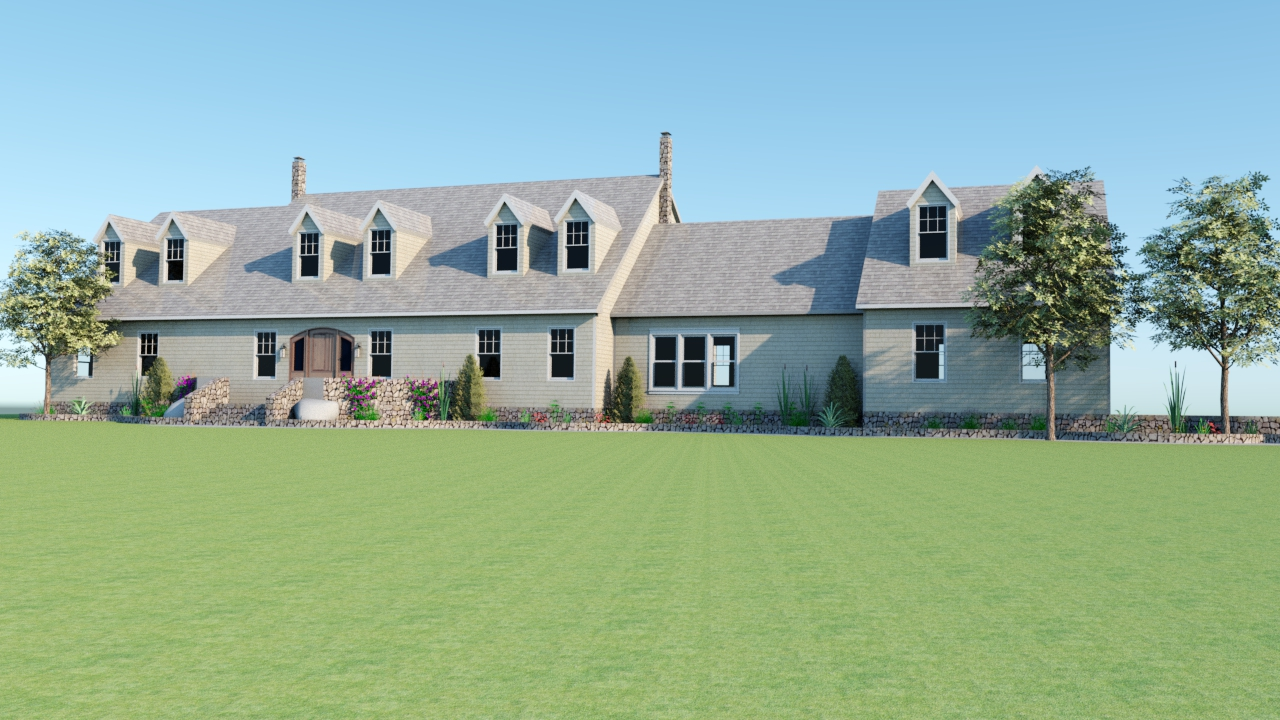
SimLab RT renderer is suitable for MCAD, interior rendering, and producing top-quality rendered images. To learn more about SimLab RT renderer, click Help in the Setting/Help menu, and select Render Help.
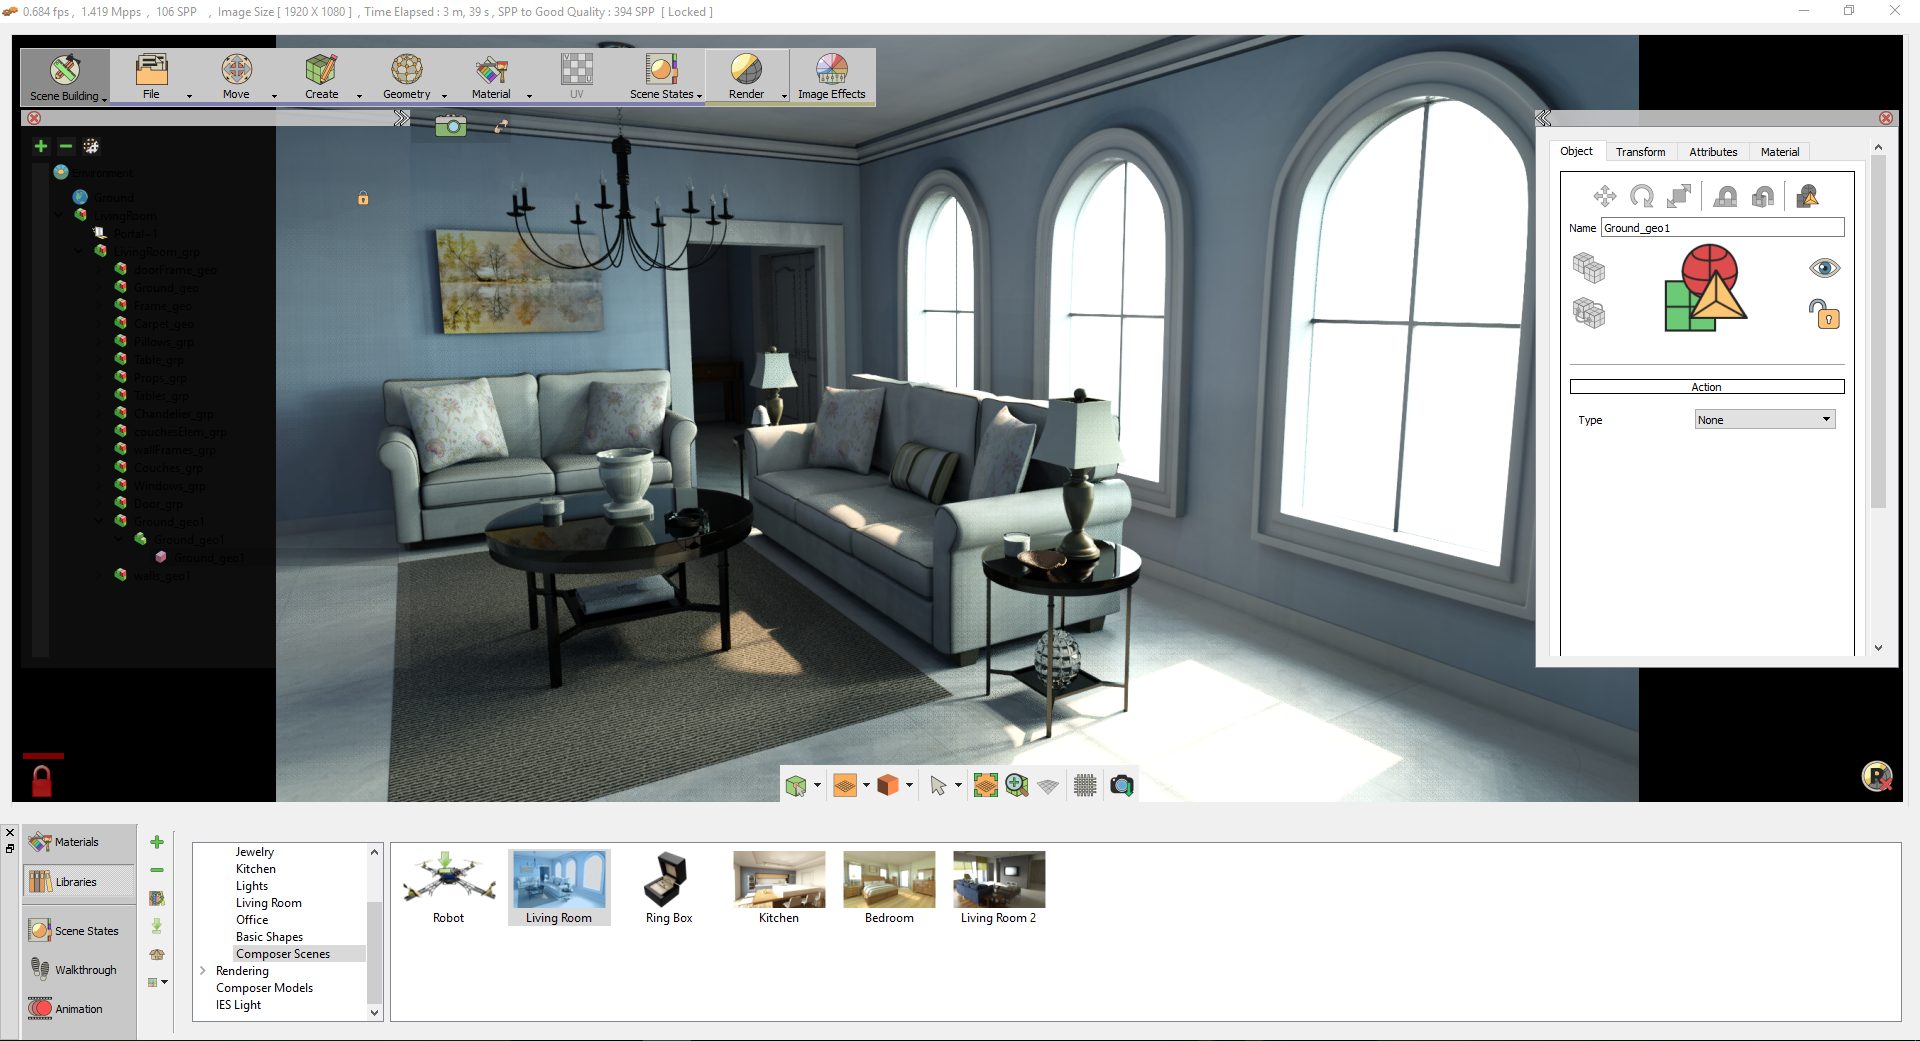
In the tutorial video below, we will show you how to import a 3D model to SimLab Composer, then shows how to assign materials, After that the tutorial teaches how to utilize the rendering capabilities of SimLab Composer.
Render Group
Real-Time
Starts real-time rendering for the 3D scene, using the parameters in Render Settings. The function short-cut is F4, and RT rendering can be stopped by un-toggling the Real Time function button or pressing F4.
Fixed
This function starts real-time rendering for the 3D scene, with a fixed image size. The image size used will be the one set in the Output Image task.
To File
Check this SimLab Rendering Basics tutorial.
Multiple Frames
Animation
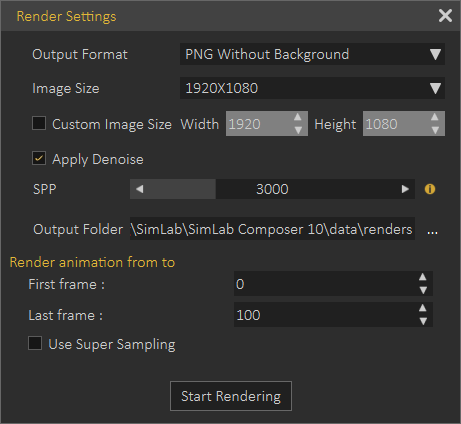
3D scenes with animation defined, clicking the Animation function will start rendering animation. Animation rendering is a limited-time rendering, from the First Frame to the Last Frame set in the corresponding spin boxes.

Render Animation in VR Viewer
Rendering is a complex process that generates realistic images, rendered images in many cases cannot be distinguished from photos. Performing complex rendering consumes a significant amount of time.
Users interested in previewing their work quickly can use VR-based rendering that gives users great images in a very short time. It is useful for multi-iterations until the user is ready for the final animation render.
The only difference in the Render Settings dialog here is the added Use Super Sampling option.
Sun Study
This is useful for landscape designers, architects, and interior designers, where the user defines the initial and final sun states.
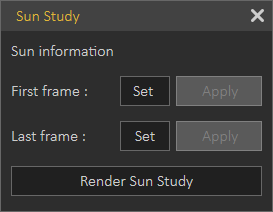
The study shows the sun and shadow states for the scene.
Scene States
For 3D scenes with scene states, this function will start consecutive rendering for the scene states defined in the scene. After setting the parameters in the Render Settings dialog and clicking Start Rendering, the Manage Scene States dialog will appear for the user to check the scene states to render, and the order of rendering. Clicking Ok will start limited-time rendering based on the SPP value.
VR-based animation rendering demo video.
Package
Distribute
Distribute rendering is supported in SimLab Composer. It allows the user to distribute the rendering of complex animations, among a number of machines. With the animation ‘*.sim’ file opened click Distribute function to open Distribute Render Animation dialog.

Fill in the required settings, and then click the Generate Rendering Packages button. The output folder containing the packages will open since the Open containing folder option was checked in the dialog.

A number of (*.srd) files equivalent to the number of machines input in the dialog, will be saved in the output folder.
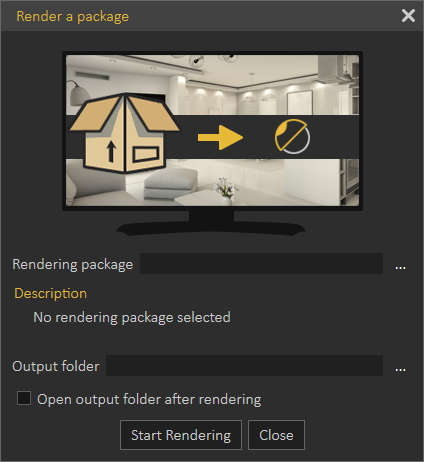
Copy each file to a rendering machine that has SimLab Composer already installed. Click the Render function, in the Package group, to open its dialog. Browse to the rendering package (*.srd) file, and select the output folder. Check the Open output folder option, and then click Start Rendering. A rendering animation progress bar will continue to appear along with rendering menus until the animation rendering is done.
Settings Group
Image Effects
SimLab Composer provides its users with image post-processing capabilities, where any combination of image effects can be applied to a rendered image. In this task, the Tree/Task panel will display the Render Settings for the image.

Vignetting
Reduces image brightness/saturation, at the periphery of the image compared to its center.
Gray Scale
This effect renders the image in grayscale.
Edges
This effect renders the current model with the edges shown.
Blooming
A glow was added to the rendered image. The user can change the Blur Radius, Brightness, and Opacity for this effect.
Cool, Warm and Saturation
These image effects can be applied by setting a delta value, and they can be applied exclusively.
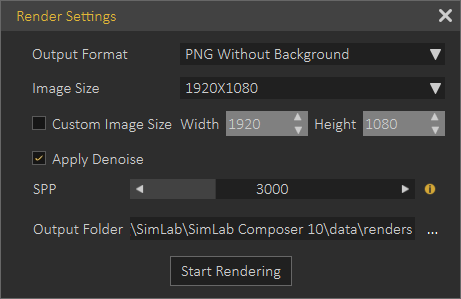
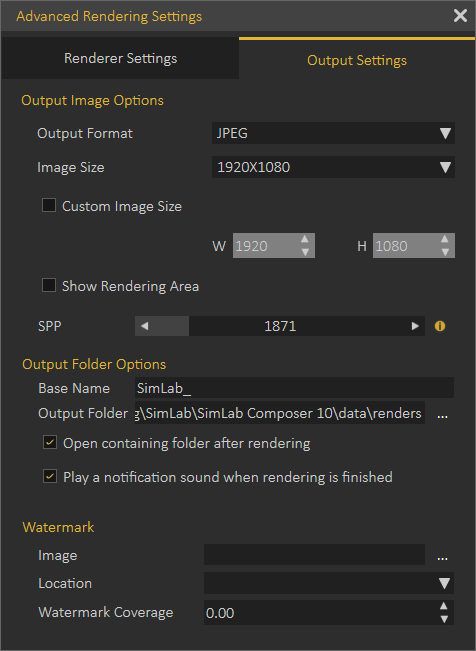
Output Settings
In this dialog tab, the user can select the format for the output image and its dimensions. The user can also input the base file name, the output folder, and SPP to limit the rendering. The open containing folder check option will open the output folder after finishing rendering.
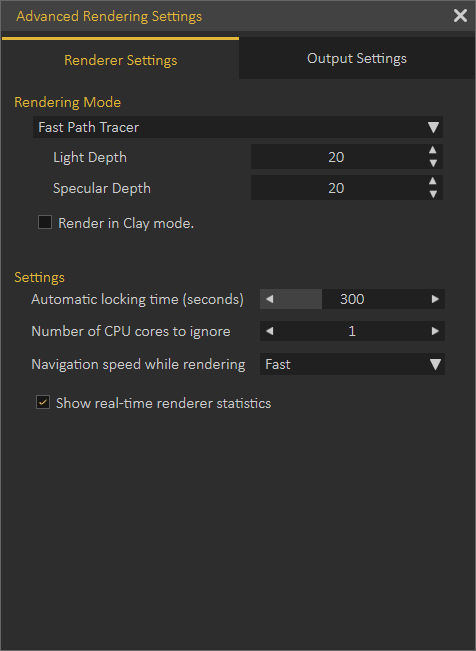
Advanced Render Settings
In this panel, the user can set the main rendering parameters.
- Rendering modes: where the user can select from available types of rendering modes:
- Fast Path Tracer.
- MIS Path Tracer.
- Interior Renderer.
- Element Renderer.
- Light Depth: Set the amount of light energy.
- Specular Depth: Control the visual appearance of specular reflections. It represents the amount of specular reflectivity a surface has.
- Automatic locking Time (seconds); is the time in seconds after which the image will be locked for navigation, in case of Real-Time View rendering. Setting this value to Zero will disable automatic locking.
- The number of CPU cores to be ignored; is the number of CPU cores not used by the renderer. This is helpful when the user is working on other applications while rendering. Setting this parameter to 0 will use all cores for rendering.
- Navigation speed while rendering;
The default values for both Light Depth and Specular Depth (which is "3") are good and commonly used. Don't change this unless you really know what you're doing.
No Comments