
VR Viewer Menu
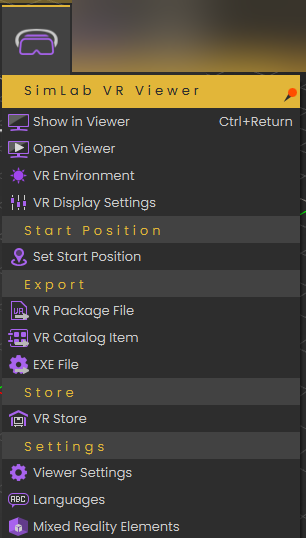
Show in Viewer
SimLab VR Viewer enables users to experience rich and interactive environments in three navigation modes
- Desktop: Game-like controls using keyboard and mouse, with viewer running on Windows or Mac.
- PC VR: For VR headsets connected to a PC like Rift S, VIVE, VIVE Pro, or Quest connected with a link cable
- Standalone VR: For standalone headsets like Pico, Quest (not connected to PC), Android, and iOS
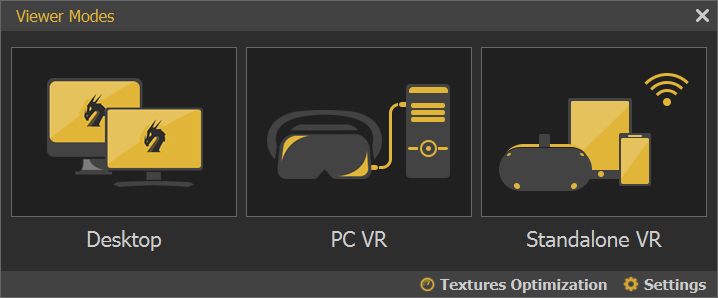
Texture Optimization
More information about Textures Optimization can be found here
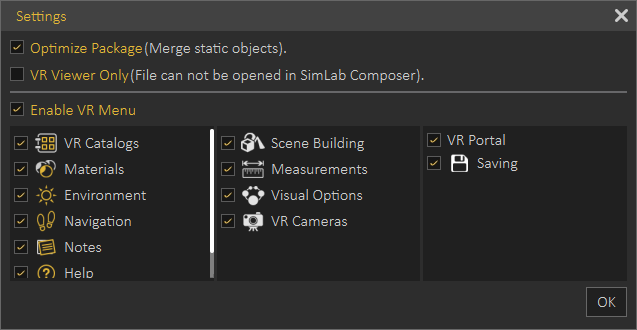
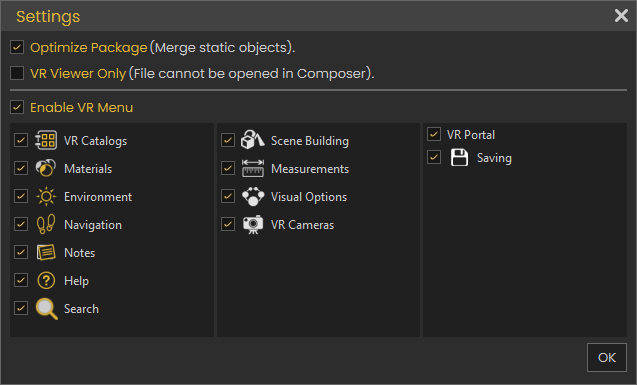
Settings
Optimize Package: Optimize package merges all objects sharing the same material into one object, which in turn speeds up the experience and smooths it significantly, especially when the model has a large number of objects. Optimize package will affect static objects only, so if you have objects that have animation, scene states, or are part of any interaction they will be excluded from the process and any interactions in VR will occur without any problems.
VR Viewer Only: When checked, the exported VR Package can not be imported by SimLab Composer
Enable VR Menu: The experience designer can control what the user running the VR Experience will be able to view, or how the user can interact with the scene in the VR Viewer
Open Viewer
Opens the stand-alone VR Viewer, viewer can be then used to open a VR Package, or to share a VR Package with others.
VR Environment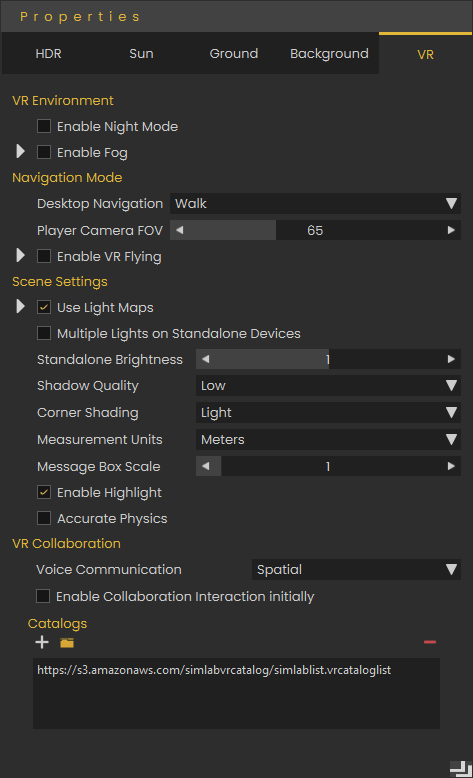

Displays the Properties dialog at the right side of the application window. In this dialog with its different tabs the user can change settings for application/ VR environment.
We will explain some settings which may not have a clear meaning:
Under the HDR tab, "Auto Adjust HRD Brightness (VR)" will put a limit on the brightness of the HDR when running the VR Experience on the Viewer, if you want to have high brightness for the Viewer, you should disable this setting.
The Ground tab affects only Rendering and thus is only found in Composer.
Under the VR tab, let's clarify the following settings:
"Enable VR flying": Since users can't switch between navigation modes while running experiences in VR mode, this is the setting to make the VR Experience run with flying navigation mode On.
"Use Light Maps": Allows you to use baked lighting, either created in SimLab Composer or imported with the model. Light maps simulate lighting effects without requiring real-time calculations, reducing performance demands and ensuring a smoother VR Experience, especially on lower-end devices.
"Multiple lights on Standalone Devices": This affects artificial lights (lights that you add from the "Create" menu), it will enable or disable them when specifically running them on standalone devices, since these lights can heavily affect the performance on them.
"Enable Highlights": This will enable/ disable the highlights that you see on objects that you can interact with or grab.
"Accurate Physics": If you have physics in you experience, this will increase the accuracy by making more calculations for the simulation of physics, but with a cost on performance.
"Adding Catalogs": Catalogs are specialized asset collections that can be created in SimLab Composer and uploaded online for easy access. This feature allows you to link external assets to a scene, enabling users to import them dynamically during the VR Experience runtime. Unlike standard assets, catalogs can be stored and retrieved from an online repository, making them accessible across multiple projects and devices.
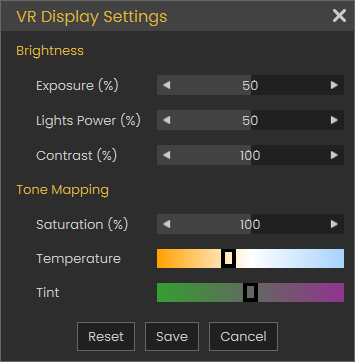
VR Display Settings
The user can adjust the display settings in the VR Viewer using the below dialog. Check this tutorial for more information.
Set Start Position
Loads the Viewer Start model, clicking on any place in the scene after clicking Set Start Position will snap the Viewer Start model to the picked location. The Viewer Start model defines the start place for the VR Experience viewer and the orientation at the experience will start at.
If Viewer Start model was already added to the scene, no new model will be added and the user can directly click to snap the Viewer Start model.
Users starting the VR Experience without calling Set Start Position will automatically have Viewer Start model added to the scene and will be able to set its location in the scene.
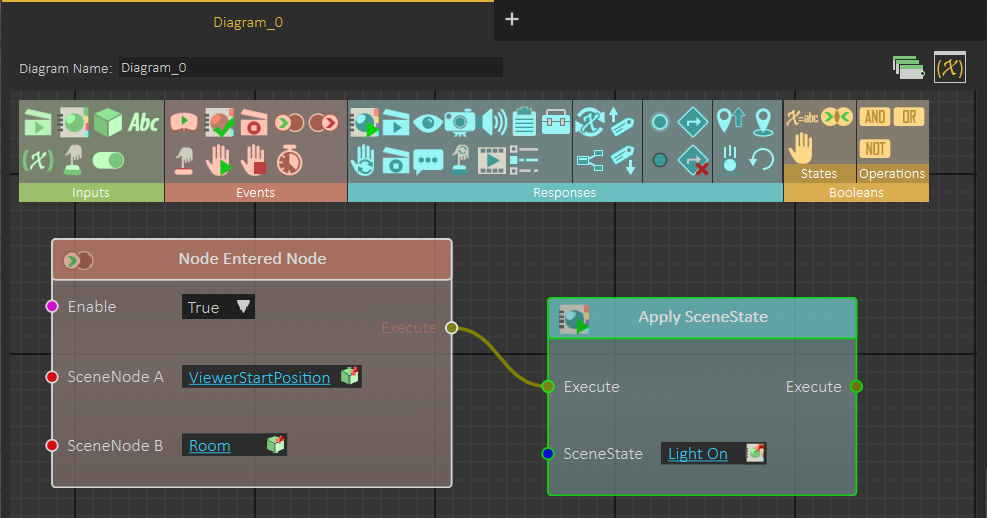
Viewer Start model can be used in Training Builder, for example, Viewer Start model is used in Node Entered Node Event, in Training Builder diagram, to turn lights on, when a VR Experience user enters a room.
Create VR Camera
Creating VR Camera adds a new VR Camera to the scene. The user should place the camera and set its orientation, currently selected VR Camera appears in wireframe mode.

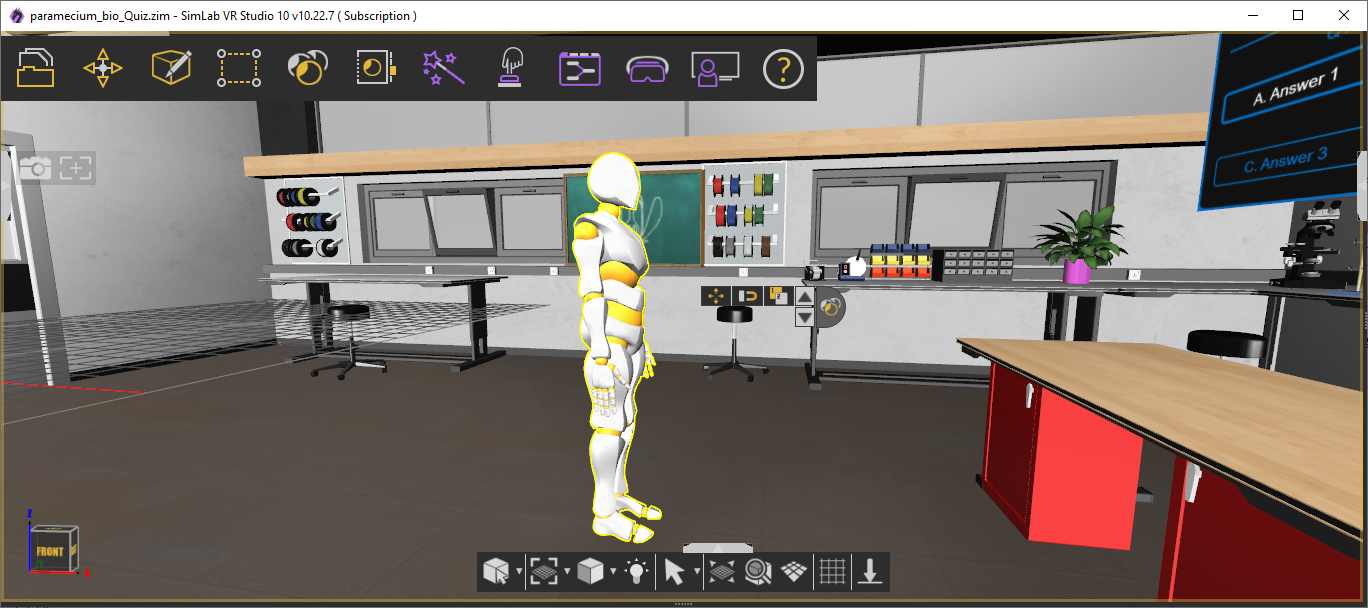
User can place multiple VR Cameras in the scene, while running the VR Experience the user can activate the Camera Teleport mode, by clicking on it, or using the shortcut (4), as shown in the following image

When starting Camera Teleport mode, the scene turns into a ghost view, VR Cameras are shown as white spheres, and hovering over one of the spheres shows the view from the camera's perspective, clicking on the white sphere moves the user to the VR Camera's location.

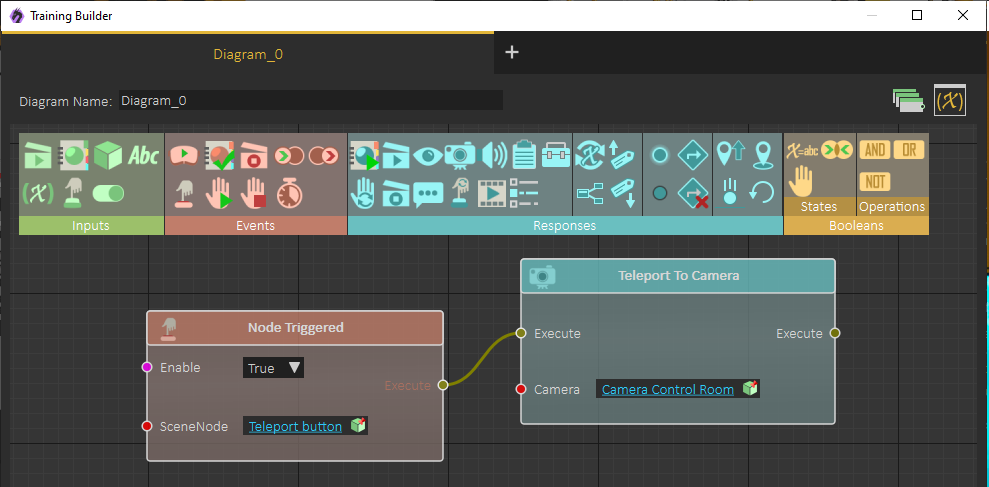
VR Camera can also be used in Training Builder, in the Teleport to Camera response block. When this response is called, the viewer is moved from the current location to the location of the VR Camera connected to the response block
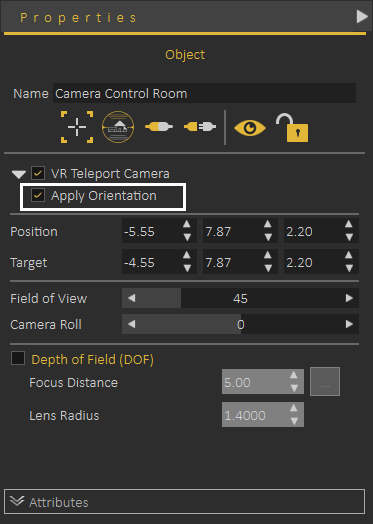
When moving the viewer to a VR Camera, we can select to align the viewer orientation with the orientation of the VR Camera, this is done by checking the option Apply Orientation in the VR Camera Properties Panel, as shown in the following image:
VR Camera can also be linked to the Surveillance Plane under the VR Effects menu, to learn more about using VR Camera with a VR Surveillance camera use the following link
Export VR Package
Export the current scene as a VR Package (*.vrpackage), which can be opened using the free SimLab VR Viewer. When exporting the VR Package the user can set:
- Title
- Publisher
- Description
- Preview image

This information will be visible in the VR Viewer to help users to find the correct VR Experience.
Export VR Catalog Item
VR Catalog Items are very similar to VR Packages, and they share the same extension (*.vrpackage), the only difference is that they will not require adding Viewer Start model, as they are not planned to be used as stand-alone VR Experiences, they are created to be used in VR Catalogs, visible while running the VR Experience, as the one shown in the image below: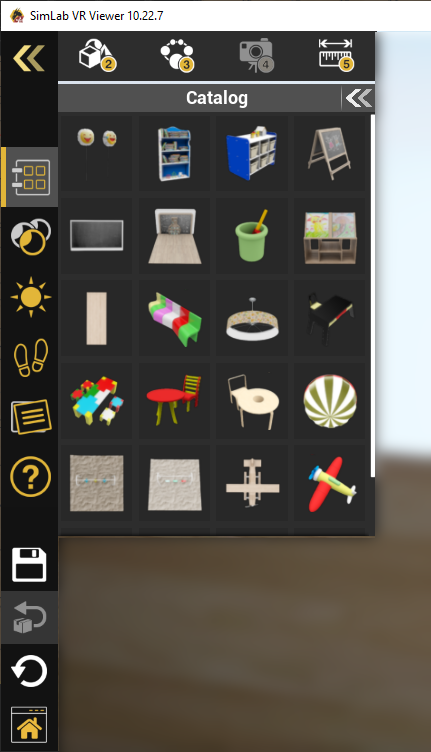
Creation of new VR Catalogs requires the ultimate edition of SimLab Composer
Export EXE File
EXE files can be exported from the Windows version of SimLab Composer, they are similar to VR Packages, as they include the current scene. EXE files can be shared with users who do not have VR Viewer installed.
Upon clicking on the EXE, it will try to find VR Viewer, if found it will use it and open the scene. If VR Viewer was not found, it will automatically install the latest version of VR Viewer, then it will use it and open the scene, which makes it easier to share VR Experiences with new users.
VR Store
Designed to simplify the process for VR Experience designers to market and sell their creations. In earlier versions, we tested a VR warehouse model, but based on feedback from designers, it was clear that they preferred licensing their VR Experiences instead of selling zim files. This allowed them to retain copyrights for the zim files, enabling them to build new experiences on top of them or customize them for specific users. SimLab VR Store addresses these concerns by offering an alternative avenue for marketing and selling VR Experiences, while still maintaining the availability of traditional methods. This new feature is particularly advantageous for larger organizations, providing them with an easier way to sell their VR content and gain more visibility. Any experiences created using the free SimLab Composer and VR Studio, after undergoing the review process, will be showcased in the VR Store. These experiences can be either paid or free and will appear without watermarks. This flexibility is beneficial for new users who want to start showcasing their work without any initial financial investment, and it also caters to the needs of educational institutes. The VR Store is intended for creators, and we welcome any notes, requests, or feedback from users. Your input is valuable in helping us refine and improve this platform to better serve the VR community. Please feel free to share your thoughts with us.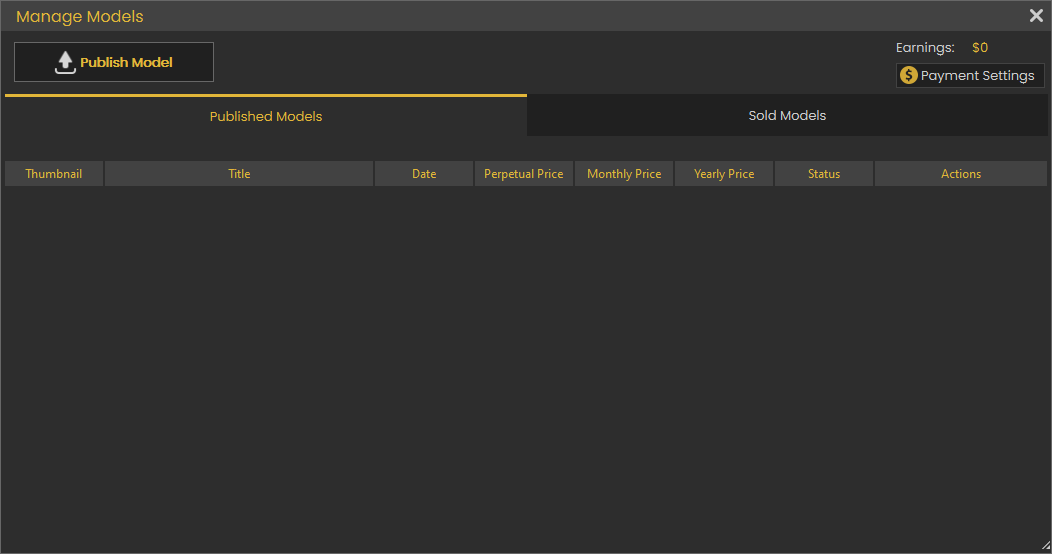
Check this article to learn how to protect your VR product and prevent Copyright infringement.
Viewer Settings
This option gives users quick access to viewer settings, to check and update those settings before exporting the VR Package.
Languages
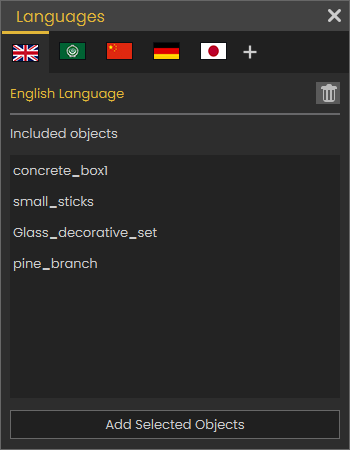
This option allows the user to make the VR Experience support multiple languages, the user defines special objects for each language, those objects can be Objects, Videos, Sounds, Presentations, or Text.
When starting the experience, the use will select the language he/ she prefers to run the experiences in, all objects in other languages will be automatically deleted, so the VR Experience will run in the selected language.
The following video shows how to use multiple language support
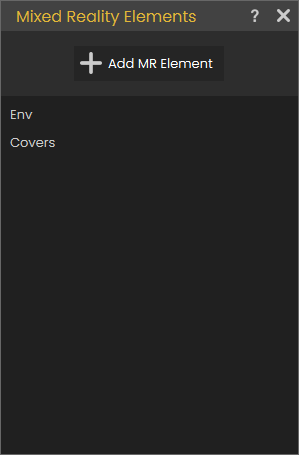
Mixed Reality Elements
The Quest 2 and Quest 3 now offer mixed reality support, enabling users to engage in interactive experiences while maintaining visibility of their actual surroundings.
With the Mixed Reality option, designers can specify the environmental elements within the experience. When users run the experience in Mixed Reality (MR) or Augmented Reality (AR) mode, these elements will be concealed, whereas they will be visible in other modes. This flexibility empowers designers to craft a unified experience that seamlessly transitions across Virtual Reality (VR), Mixed Reality (MR), or Augmented Reality (AR) modes.
The following tutorial shows how to use the MR elements:
In addition to single user MR mode, MR mode can be used in collaboration, the following tutorial shows how users located in the same room perform synchronization to work effectively in the MR mode.
No Comments