
Contacts and Sharing
Adding Contacts
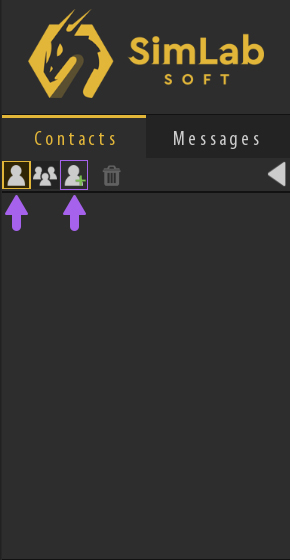
To Add Contacts, in the Contacts panel to the left make sure that the Contacts List is toggled on, then click on the "Add Contact" Icon.
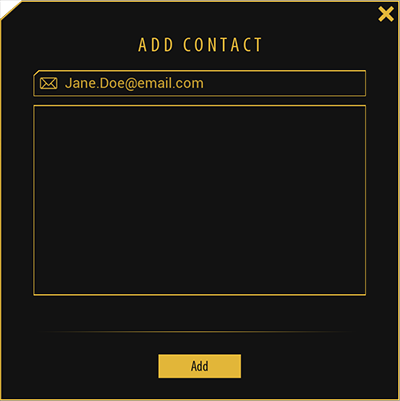
In the "Add Contact" dialogue, type the email address of the user you want to add as a contact to your list, then click on the Add button.
Note : You can add multiple contacts at the same time by separating their email addresses with a "comma" in the email field.
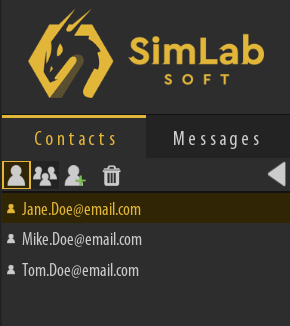
Added contacts will be displayed in the "Contacts" list as email addresses if they do not have an active SimLab Account.
Once they activate their account, their names will be displayed instead of email addresses.
Note : An email will automatically be sent to the contacts you add, inviting them to activate their SimLab cloud account in case they do not have an existing account.
Creating Groups
To manage contacts more efficiently, you can assign them to groups in order to easily share VR Experiences with them.
To create a Group, in the Contacts panel to the left make sure that the Groups List is toggled on, then click on the "Add Group" Icon.
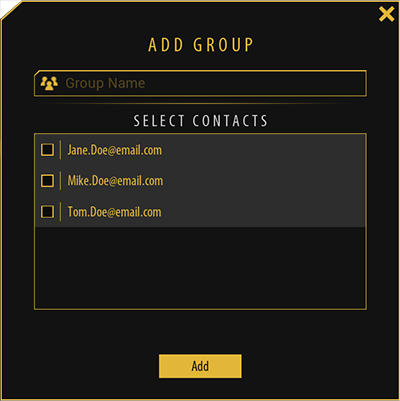
In the Add Group dialogue, type in a name for the group then select the contacts that wish to add to that group.

Once the group is created, you will find it when toggling the Groups list view in the contacts panel.
Adding Multiple Users to a Group
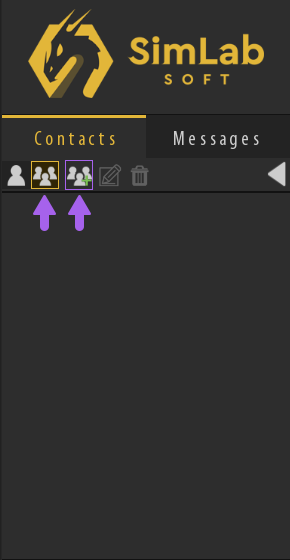
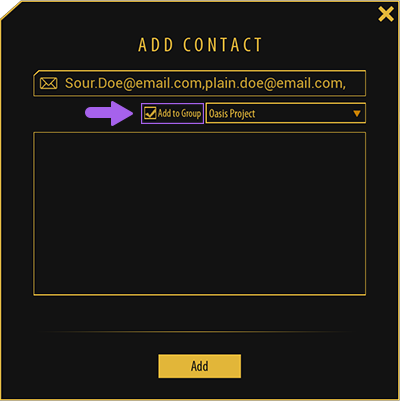
After creating a group you will be able to add multiple contacts to that group, to do so, toggle on the Contacts List then click on the Add Contacts icon.
In the Add Contacts dialogue, enable the "Add to Group" option and select the desired group, and in the email field, type or paste the email addresses separated by a "Comma", then click Add.
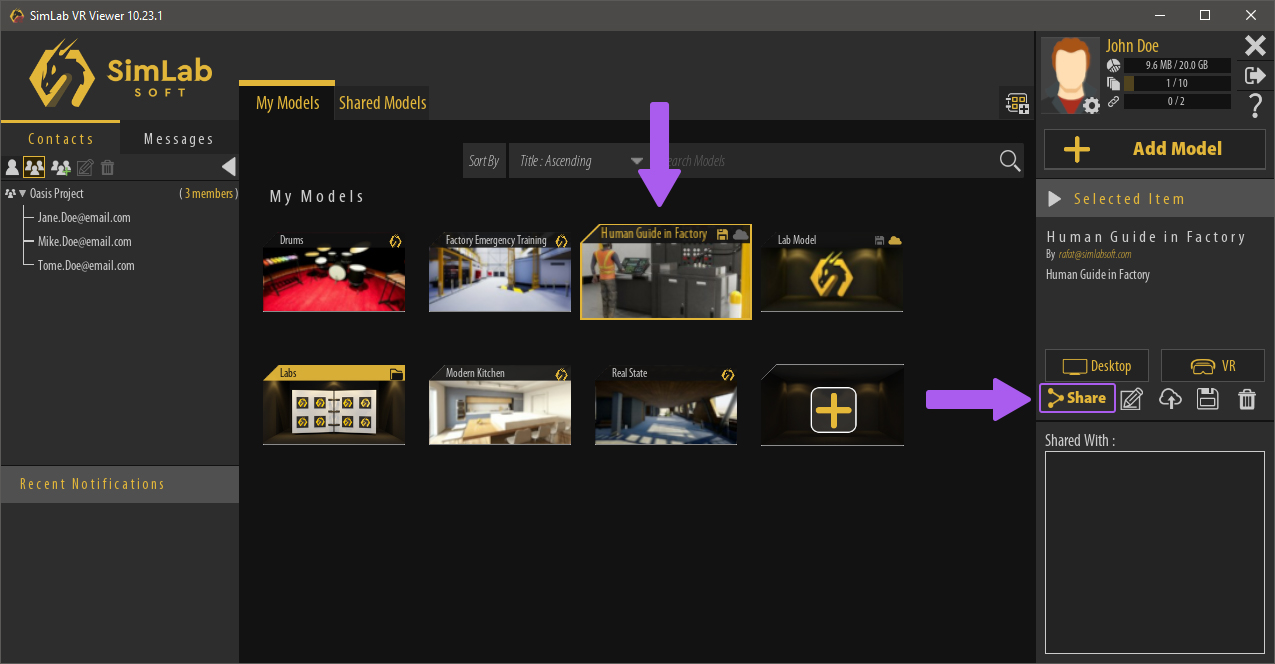
Sharing VR Experiences
Now that you have learned how to add contacts and groups, you can now Share VR Experiences with other users.
ShareBack
Watch This Video To learn more About Sharing and using ShareBack.
Messages
SimLab VR Viewer allows you to send and receive messages from contacts through the Messages Tab in the panel to the left.
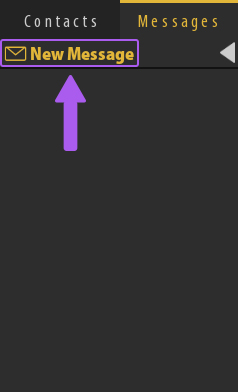
To send a message, Switch to the messages Tab and Click on "New Message".
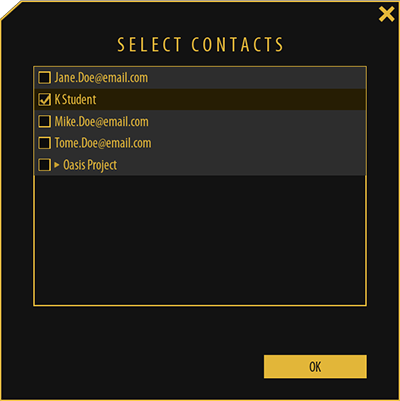
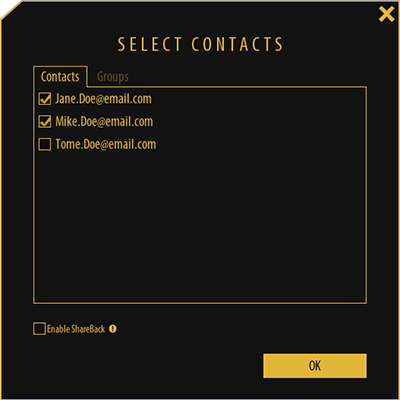
From Select Contacts dialog, select the contacts you wish to send a message to, and click "OK".
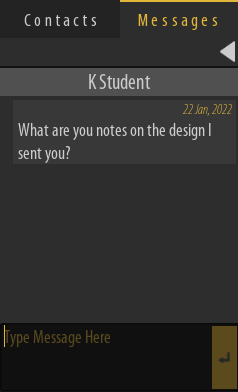
Once you have selected a contact, you can now message him by typing in the text field at the bottom then click "Send" or by pressing "Enter" on the keyboard.
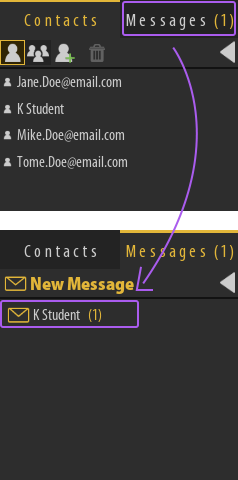
When you receive a message a notifications with the number of received messages will appear next to the Messages tab title.
Switch to the messages tab and you will find the active messaging sessions with the number of messages next to it, click it to view the received messages
No Comments