
Avatar Generator
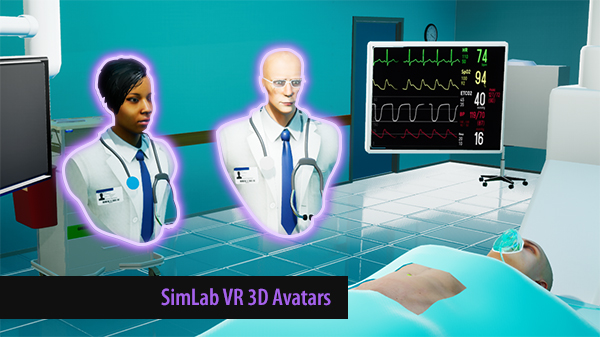
SimLab Composer and SimLab VR Studio enables you to generate your own avatars by combining different faces, uniforms, headwear and glasses together.
In SimLab Composer or SimLab VR Studio, go to the Interactions menu, and select "Avatar Generator".
Using Avatar Presets
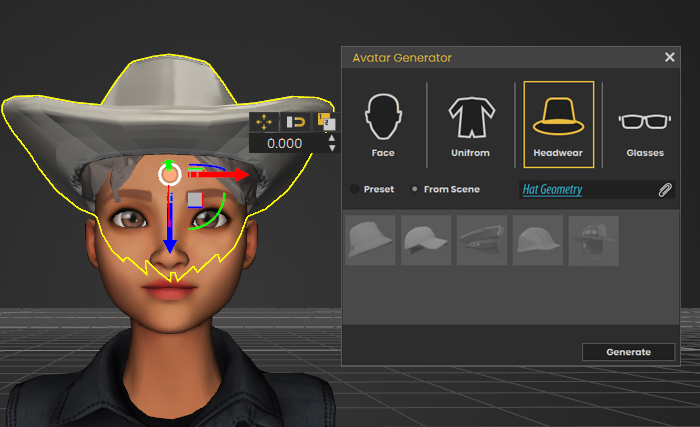
In the Avatar Generator, you can specify which component you want to change by selecting one of the icons at the top, the available components are : Face, Uniform, Headwear and Glasses.
Once you have selected the component type and with the "Preset" option toggled, you can select one of the options available for it in the lower part of the dialog.

Once you have specified all the parts of the avatar Click Generate to finalize the process.
Using your own Geometry as an Avatar component
After selecting one of the components, you will notice that you will have the option to switch from "Preset" to "From Scene".
Selecting the latter option enables you to attach an object from the scene as a component in the avatar so you can use a face or a uniform of your creation, for example, instead of the presets available.
To specify a component from the scene, select the component from the scene or from the object tree, then click on the Attach Icon in the blank field.
After attaching all the components, click Generate to finalize the Avatar creation process.
Things to keep in mind when using components from the scene:
- You can combine presets components with components from the scene in a single avatar.
- If you want to use a face component from the scene it needs to have the joint that controls the head's rotation named "Head" or you can use faces that are downloaded from Ready Player me which are compatible (More on this in the following Pages of this book).
- If the Face component does not have a joint named "Head" it will still work, but the Avatar's head would not rotate as the user is rotating his head during a VR experience.
- Make sure that the Avatar is facing the Negative Y Axis in SimLab Composer or SimLab VR studio before clicking Generate.
Click Here to learn more.
Exporting the Generated Avatar
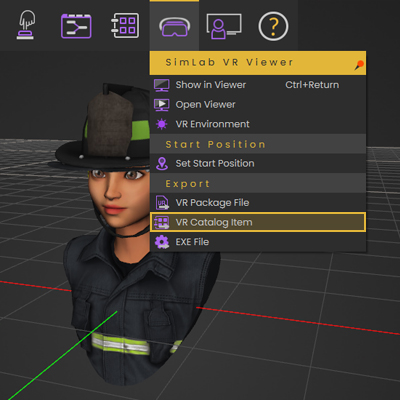
From the SimLab VR Viewer menu select Export "VR Catalog Item", then type a name for the VRPackage file and click Save.
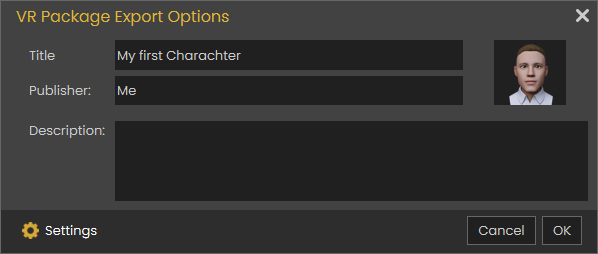
In the VR Package Export Dialogue, type in a title, the publishers name and a description for the VR package, then click "OK".
From this Dialogue you can also set the thumbnail image for the Avatar which will later appear when adding this Avatar to SimLab VR Viewer and as your profile picture in SimLab VR Viewer if this avatar was set to be used.
The recommended size for the Avatar's thumbnail is (158 pixels X 142 pixels).
(Note: if you are planning to distribute Avatars on multiple users you need to export a unique avatar for each user).
Adding the Avatar to SimLab VR Viewer

Similar to Selecting the Avatar, Click the Profile image at the top right corner in SimLab VR Viewer, then click the Avatar Image to open the Avatars Browser.
From the Avatar Browser window click the "Add Custom Avatar" Button at the bottom left corner to open the file browser, then select the VRPackage File you saved earlier and click OK to set it as your 3D Avatar.
No Comments