SimLab VR Viewer for Students and Trainees
- Signing Up
- Running Shared VR Lessons
- VR Lesson Navigation and Interactions
- Running xAPI/ SCORM Lessons on Quest/ Pico/ IOS/ Android
- VR Viewer Settings
- Accessing files on Quest, Android, Pico, and iOS without a network connection
- Mixed Reality Collaboration Support
Signing Up
Students and Trainees
If you are a Student and Trainee and a Teacher or an Administrator has shared a VR Lesson with you, you will receive an email requesting you to join the organization and activate your account to be able to view the shared VR Lesson.

From the received email, click Join.
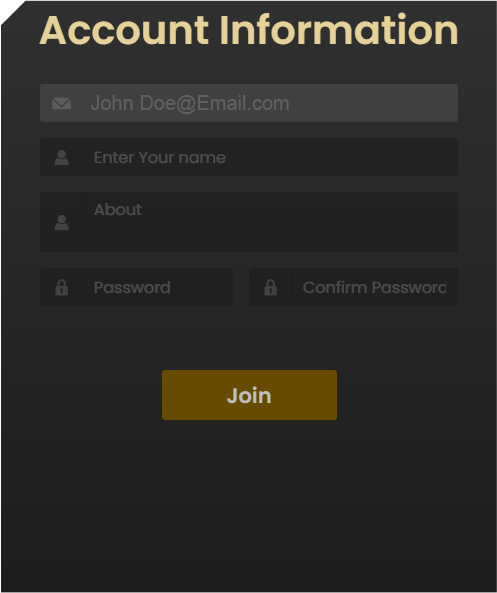
once you click Join, the account information dialogue will appear.


Running Shared VR Lessons
Accessing the Shared VR Experience
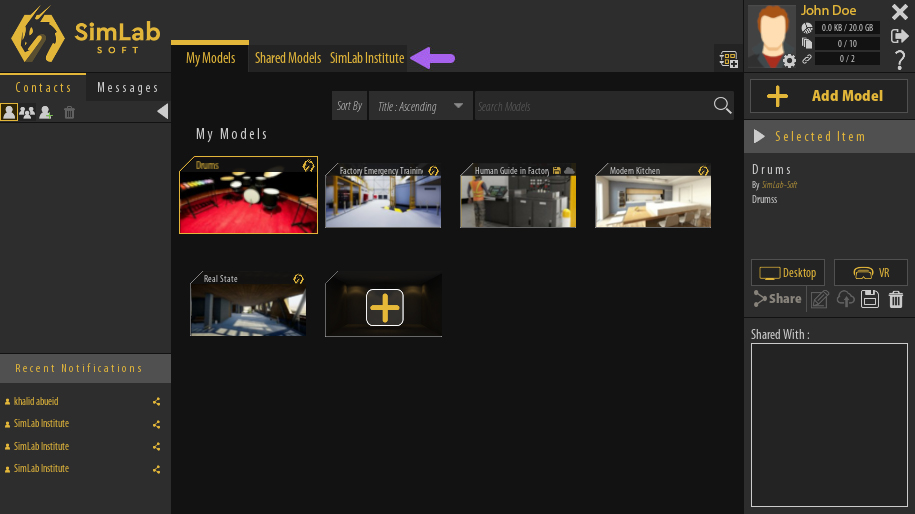
Once you are Signed in to your account in SimLab VR Viewer, click on the tab that has your organization's name.
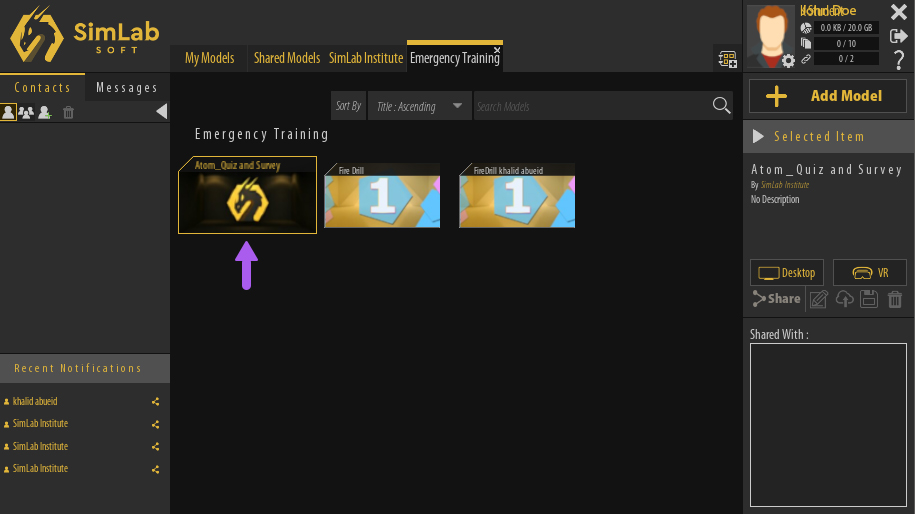
Running The VR Experience
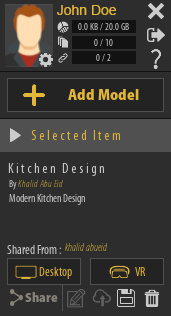
Once a VR Lesson has been selected, its name and description along with the name of the person who shared it with you will be displayed in the Selected Item Panel to the right, additionally, you will find 2 buttons to run the Experience in Desktop Mode or VR Mode.
Desktop Mode
If you are using a Windows or macOS computer and you do not have a VR headset, you can Run VR Experiences in Desktop Mode where you will be using the mouse and keyboard to navigate the scene and interact with objects.
VR Mode
With VR Mode you can run the VR experience using PC VR headsets which are VR headsets that are attached with a cable to a computer.
Supported VR devices are :

HTC Vive / HTC Vive Pro

Oculus Quest / Oculus Quest 2 / Oculus Quest 3 / Oculus Rift / Oculus Rift S

Pico Neo 2 / Pico Neo 3

Pairing Wireless Devices
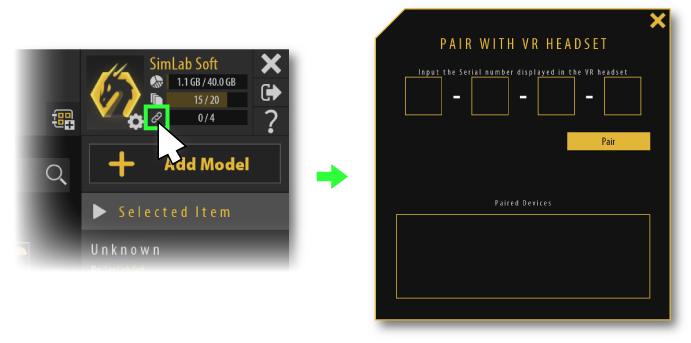
2. Run SimLab VR Viewer on the wireless device and click on Sign in at the top Right corner
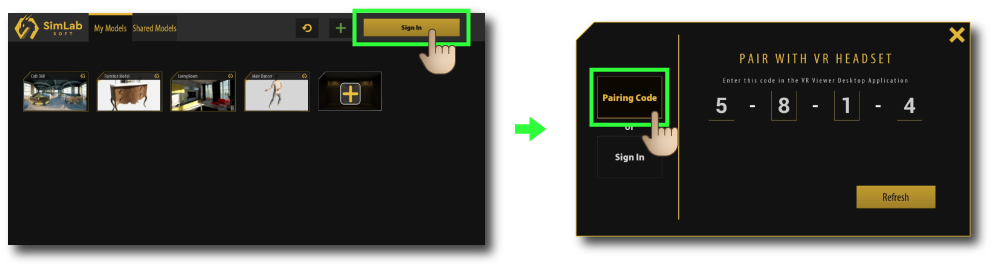
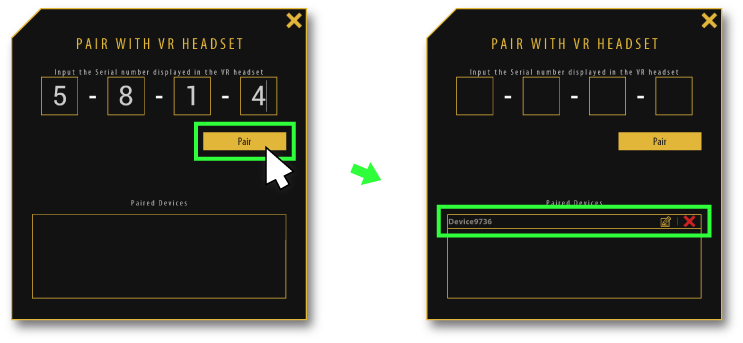
3. Insert the pairing code that shows on your device into your PC.

4. Click pair, then the device should appear on the pairing devices list, you can rename it or delete it from this list as well.
5. Click the Refresh button on your device, then all of the shared models will be displayed.
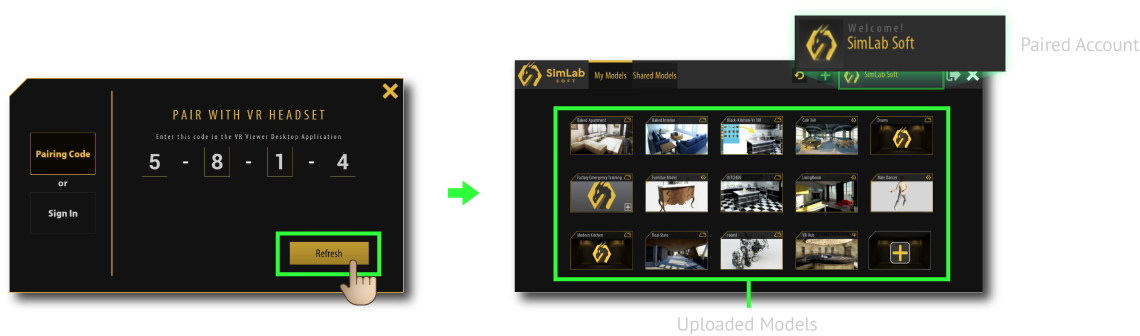
6. Select the desired model to run it on the wireless device.
VR Lesson Navigation and Interactions
Desktop Mode
If you are running the VR Lesson in Desktop Mode, you are going to be using the mouse and keyboard to navigate the scene and interact with objects.
Watch This tutorial to learn about Desktop navigation
Movement
Move around : W A S D keys or the Arrows on the keyboard.
Sprint : Hold "Shift" on the keyboard while moving.
Look around: Move the mouse.
Jump : Spacebar.
Trigger objects
To trigger an object in the scene, hold the left click and aim towards an object then release to trigger it.
Grabbing and Grabbable Sequences
To grab objects freely or to use Grabbable Sequences, aim at an object then right click to reveal the grabbing hand, then hold left click to grab an object.
VR Mode
If you are running the VR Lesson in VR Mode, you are going to be using the controllers to navigate and interact with objects.
Watch This tutorial to learn about VR navigation
Movement
Move around :
- Physically moving around will move you in VR.
- Use the Arrows or W A S D on the Keyboard (In case the VR headset is connected to the desktop).
Look around :
- Move your head physically to look around you in VR.
- Move the joystick or the track pad left and right.
- Move the Mouse (In case the VR headset is connected to the desktop).
Teleporting : Hold the joystick or the trackpad on your controller then aim towards a location on the ground then release to teleport there.
Flying : When flying is enabled, push the joystick or the trackpad on the left controller and aim the joystick in the direction you want to fly towards.
Trigger objects
To trigger an object in the scene, hold the trigger button on the controller and aim towards an object then release to trigger it.
Grabbing and Grabbable Sequences
To grab objects freely or to use Grabbable Sequences, let the virtual controller in VR reach and touch the target object and while it intersects the object hold the trigger button on the controller.
Running xAPI/ SCORM Lessons on Quest/ Pico/ IOS/ Android
You can run lessons on Quest and Pico devices using the VR viewer as follows:
Copying lesson link from the browser:
Using the web browser of the device, reach the lesson page on it's website (e.g: Moodle), then press on the "copy" button indicated in the following image to copy the URL of the lesson to paste it into the VR viewer

Pasting the URL into the VR Viewer:
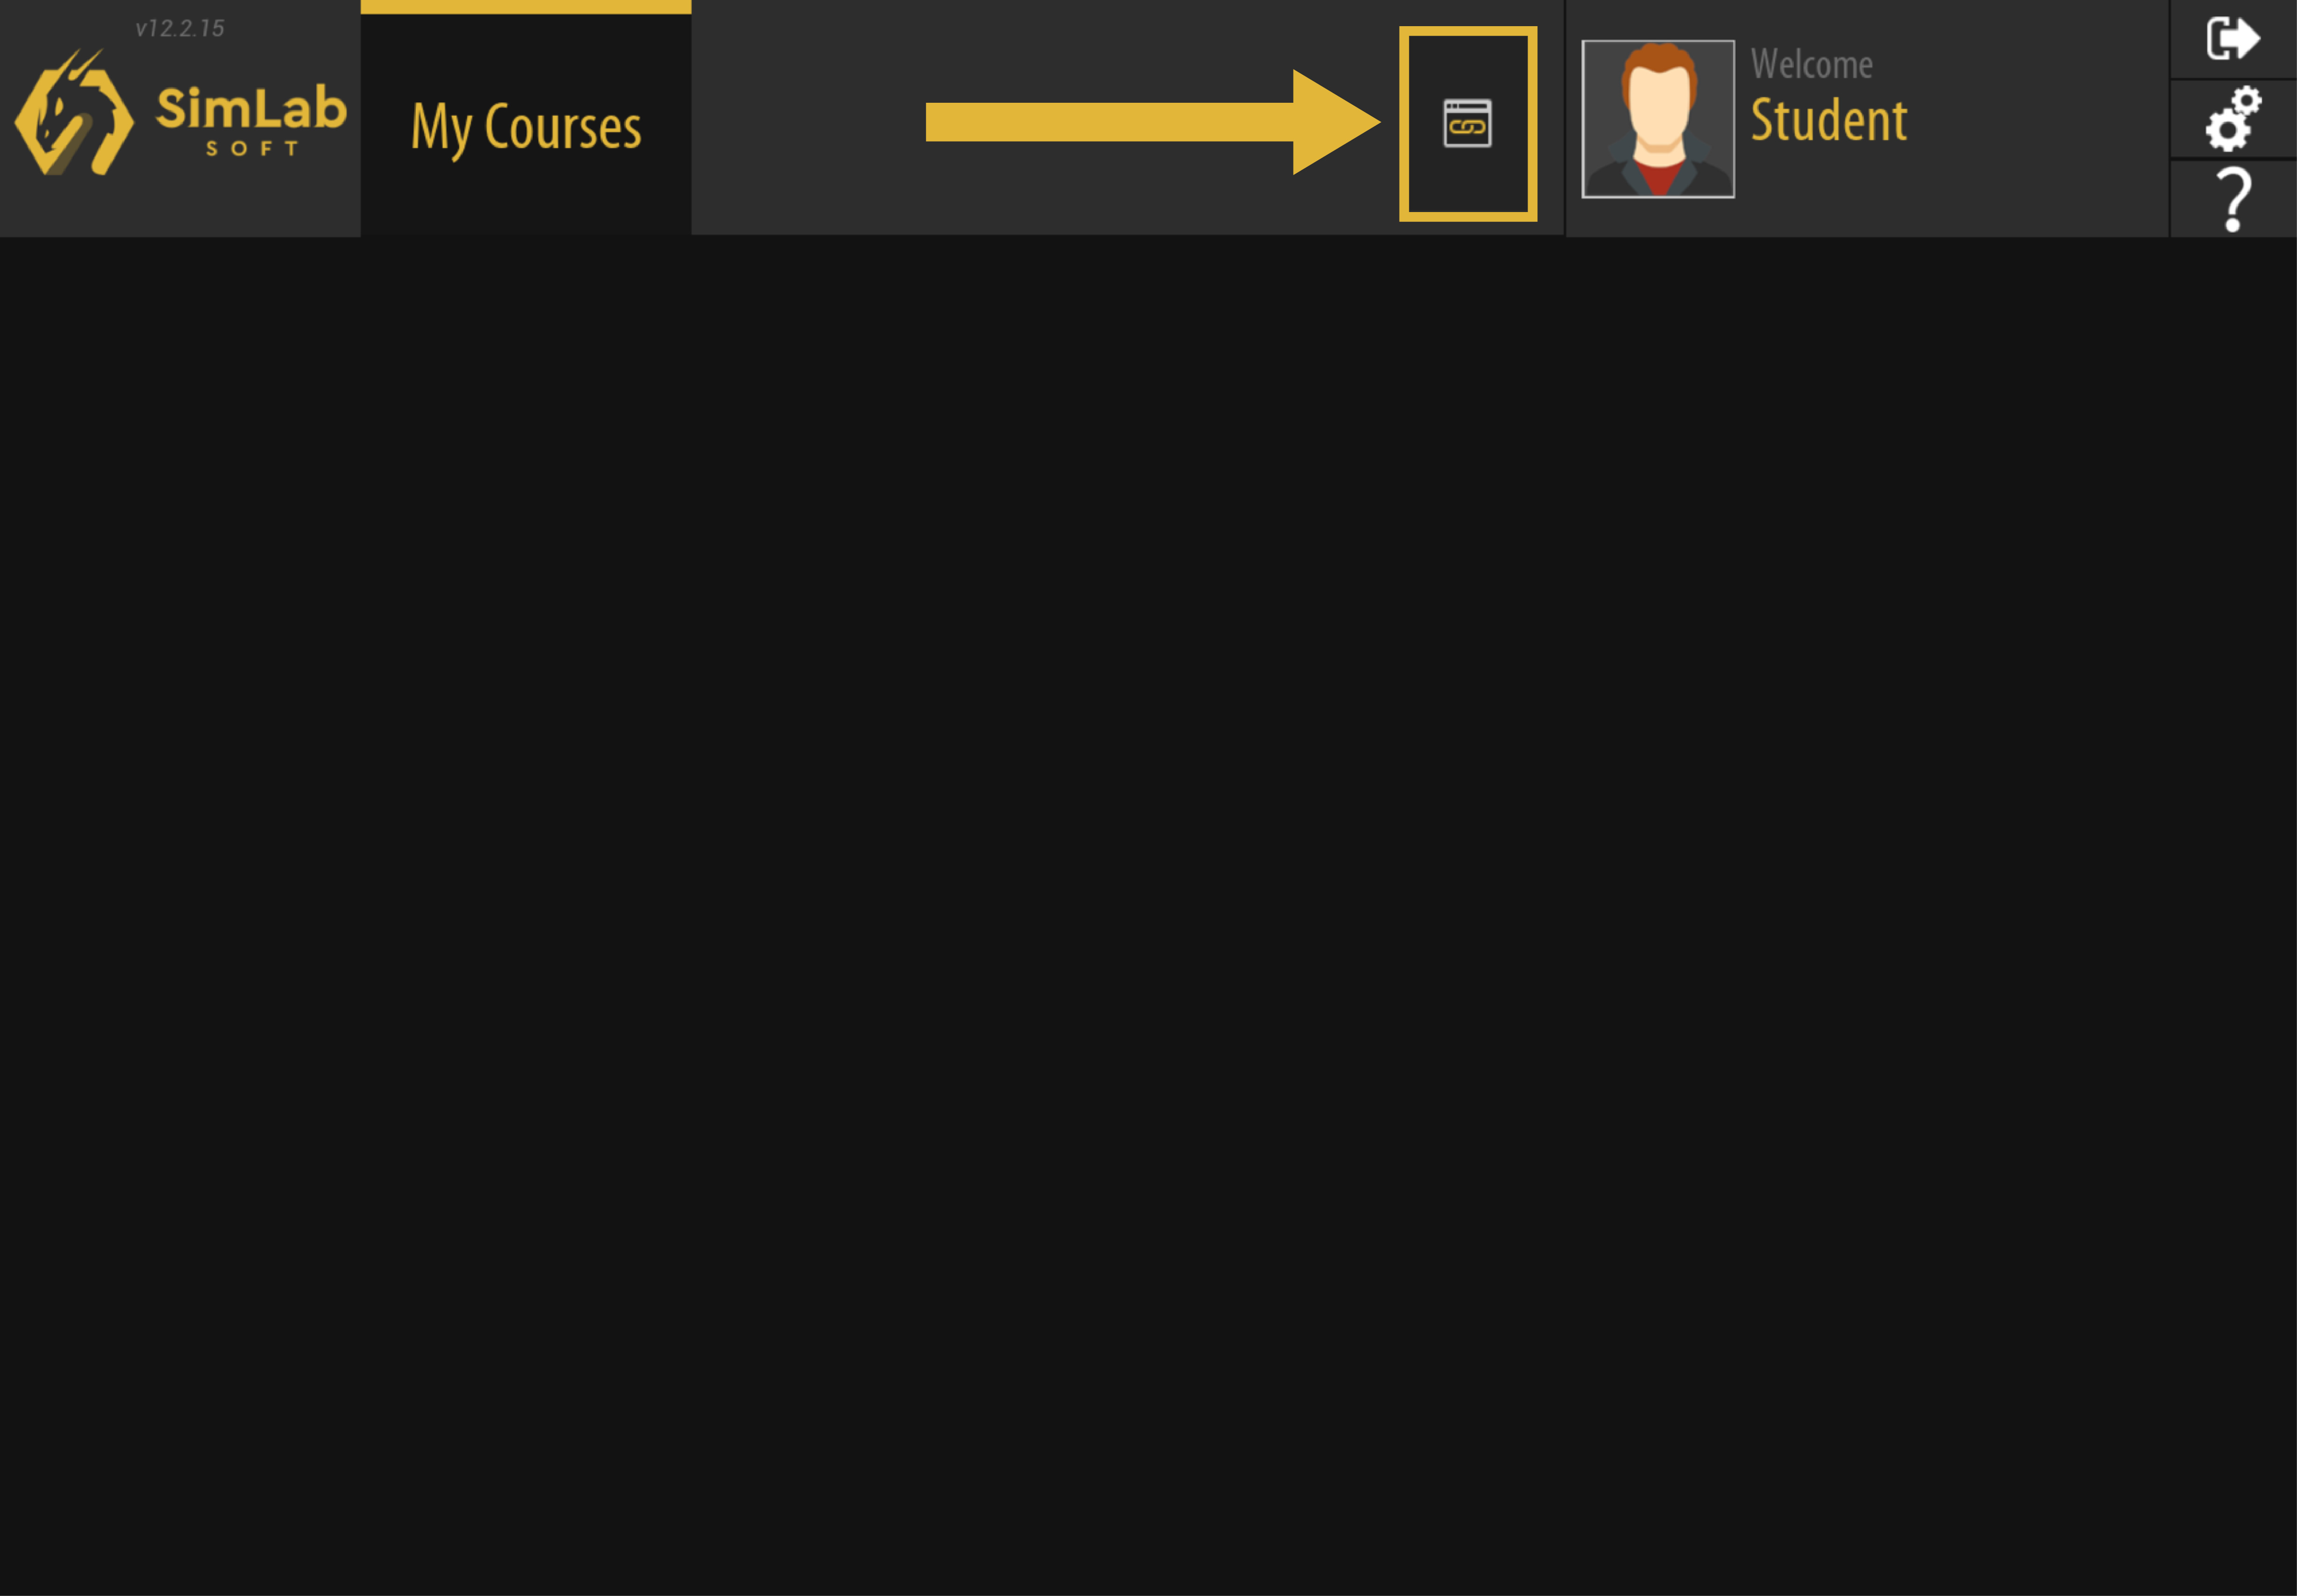
Now in the VR viewer, press on the indicated button in the following image to open the window where you can paste the URL
Now press on the indicated image in the following image to paste the URL, then press on "confirm"
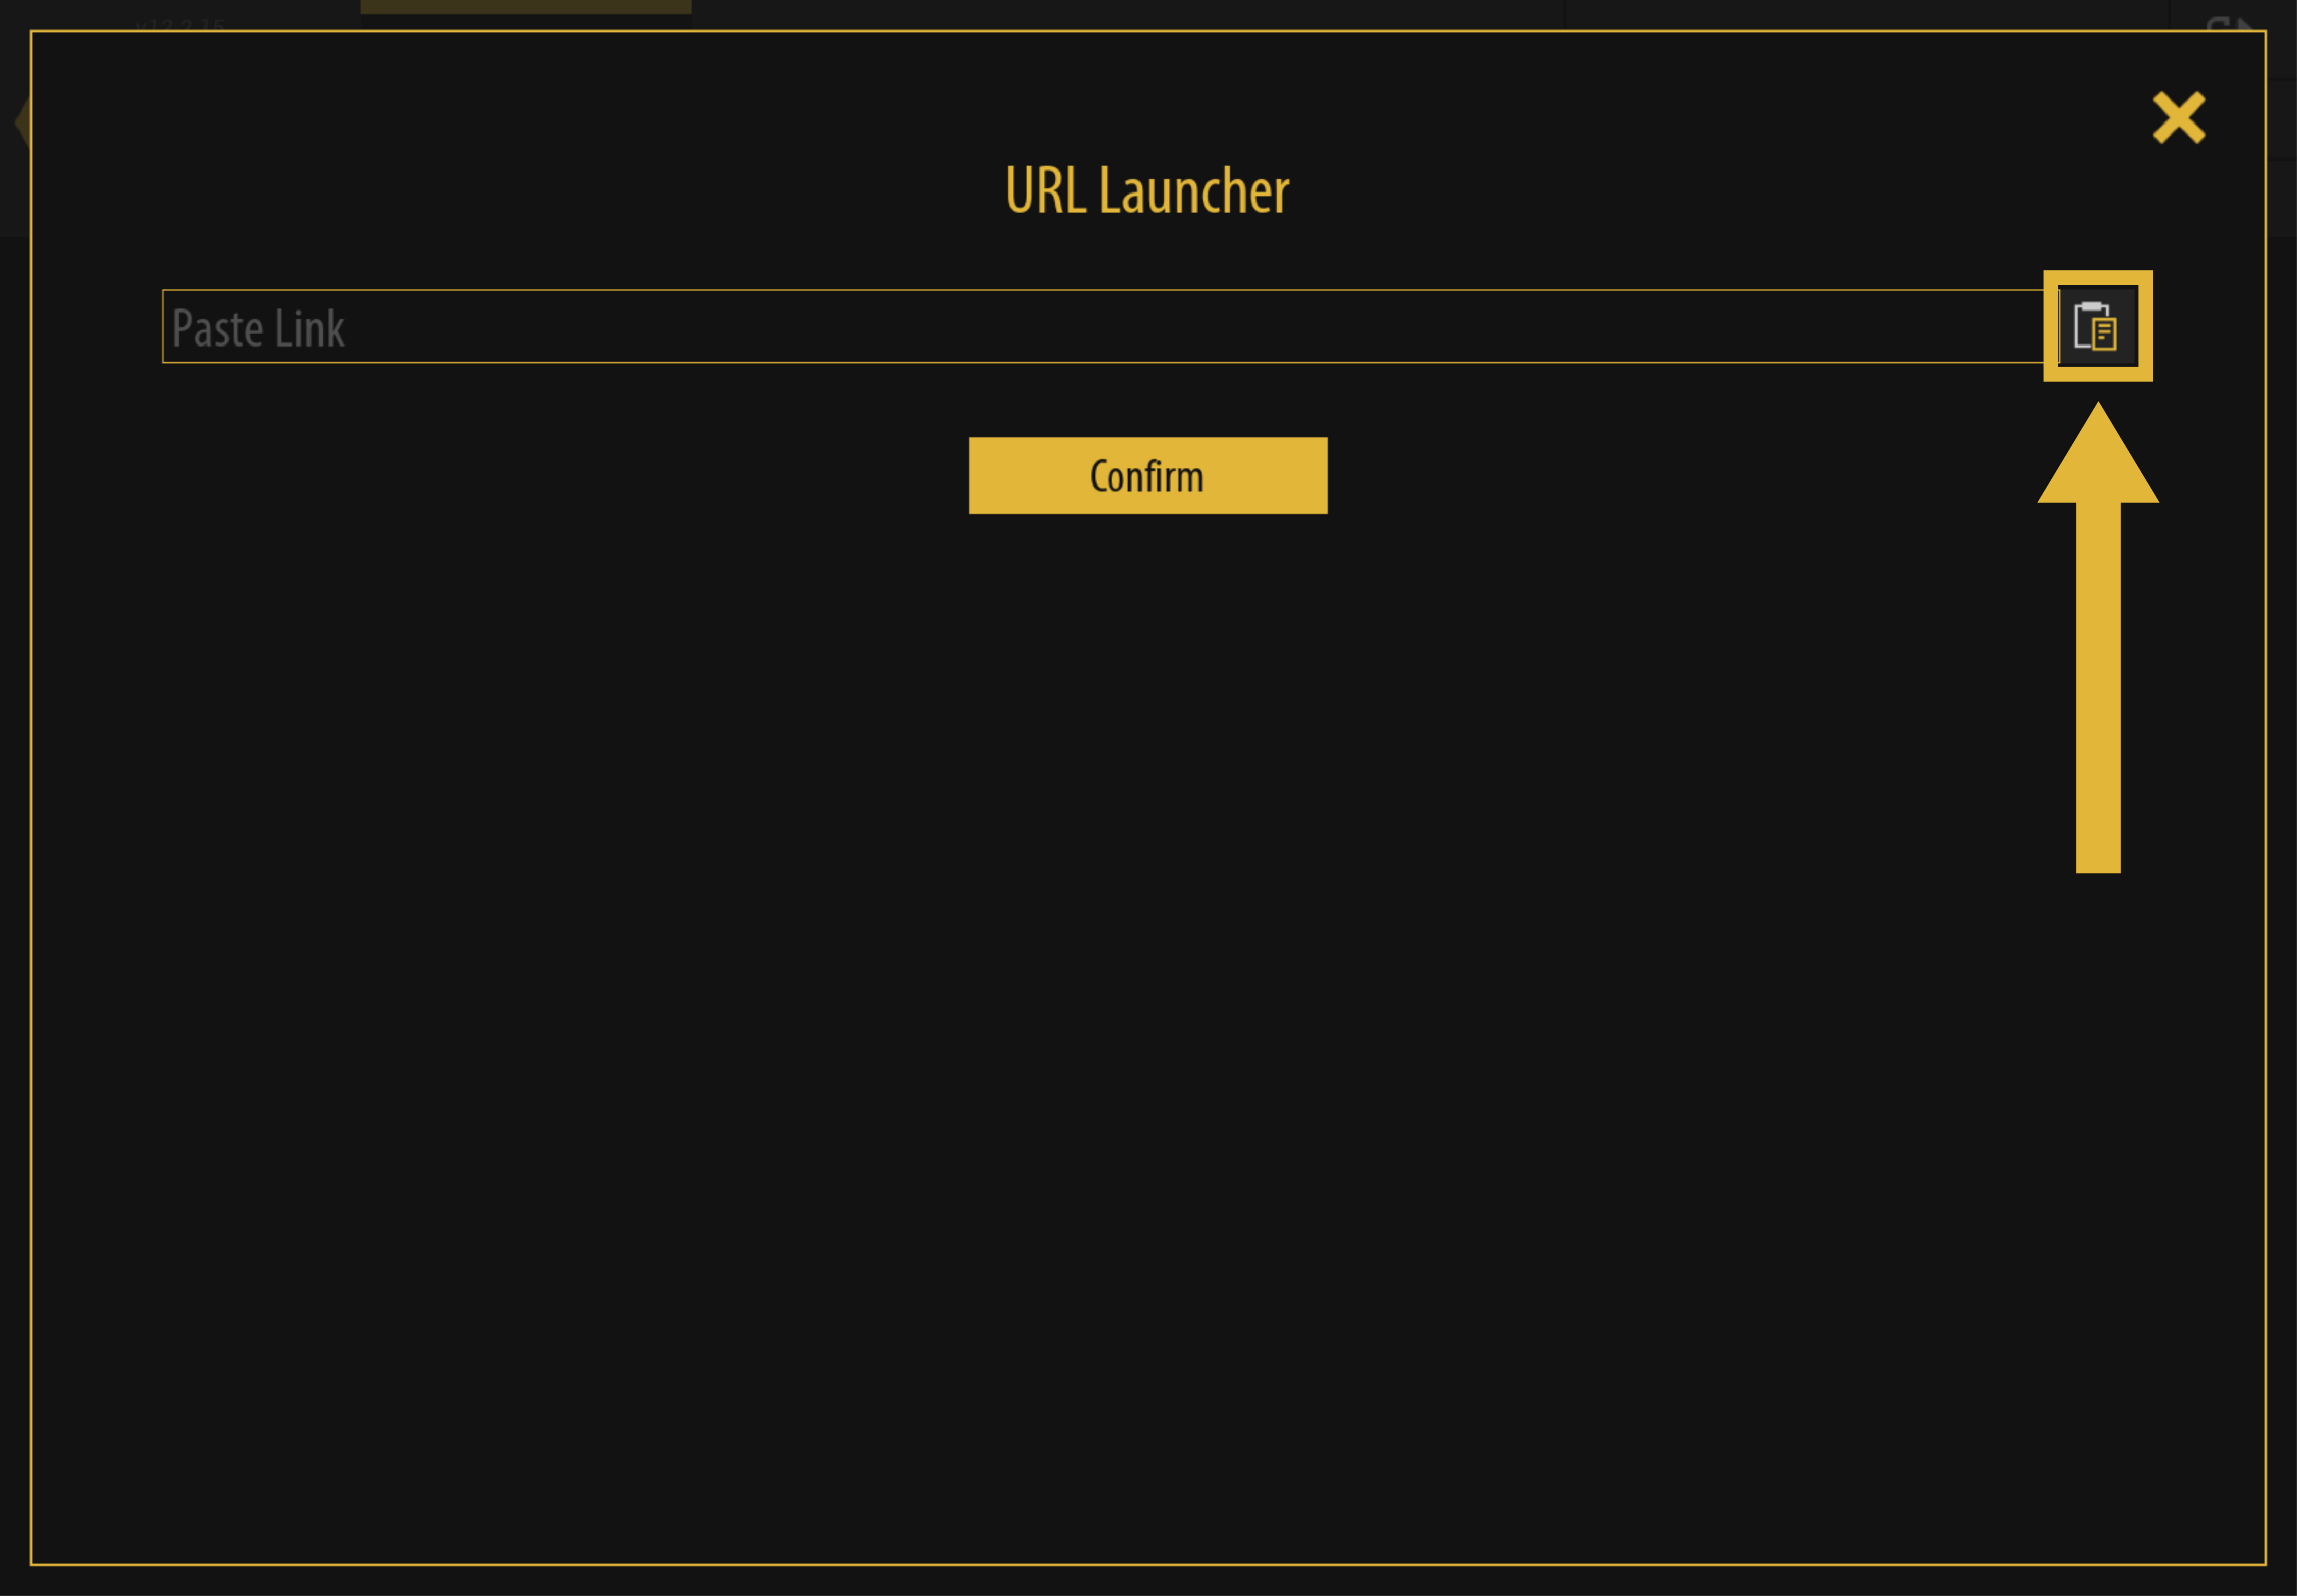
Now the VR lesson should download and run on your device.
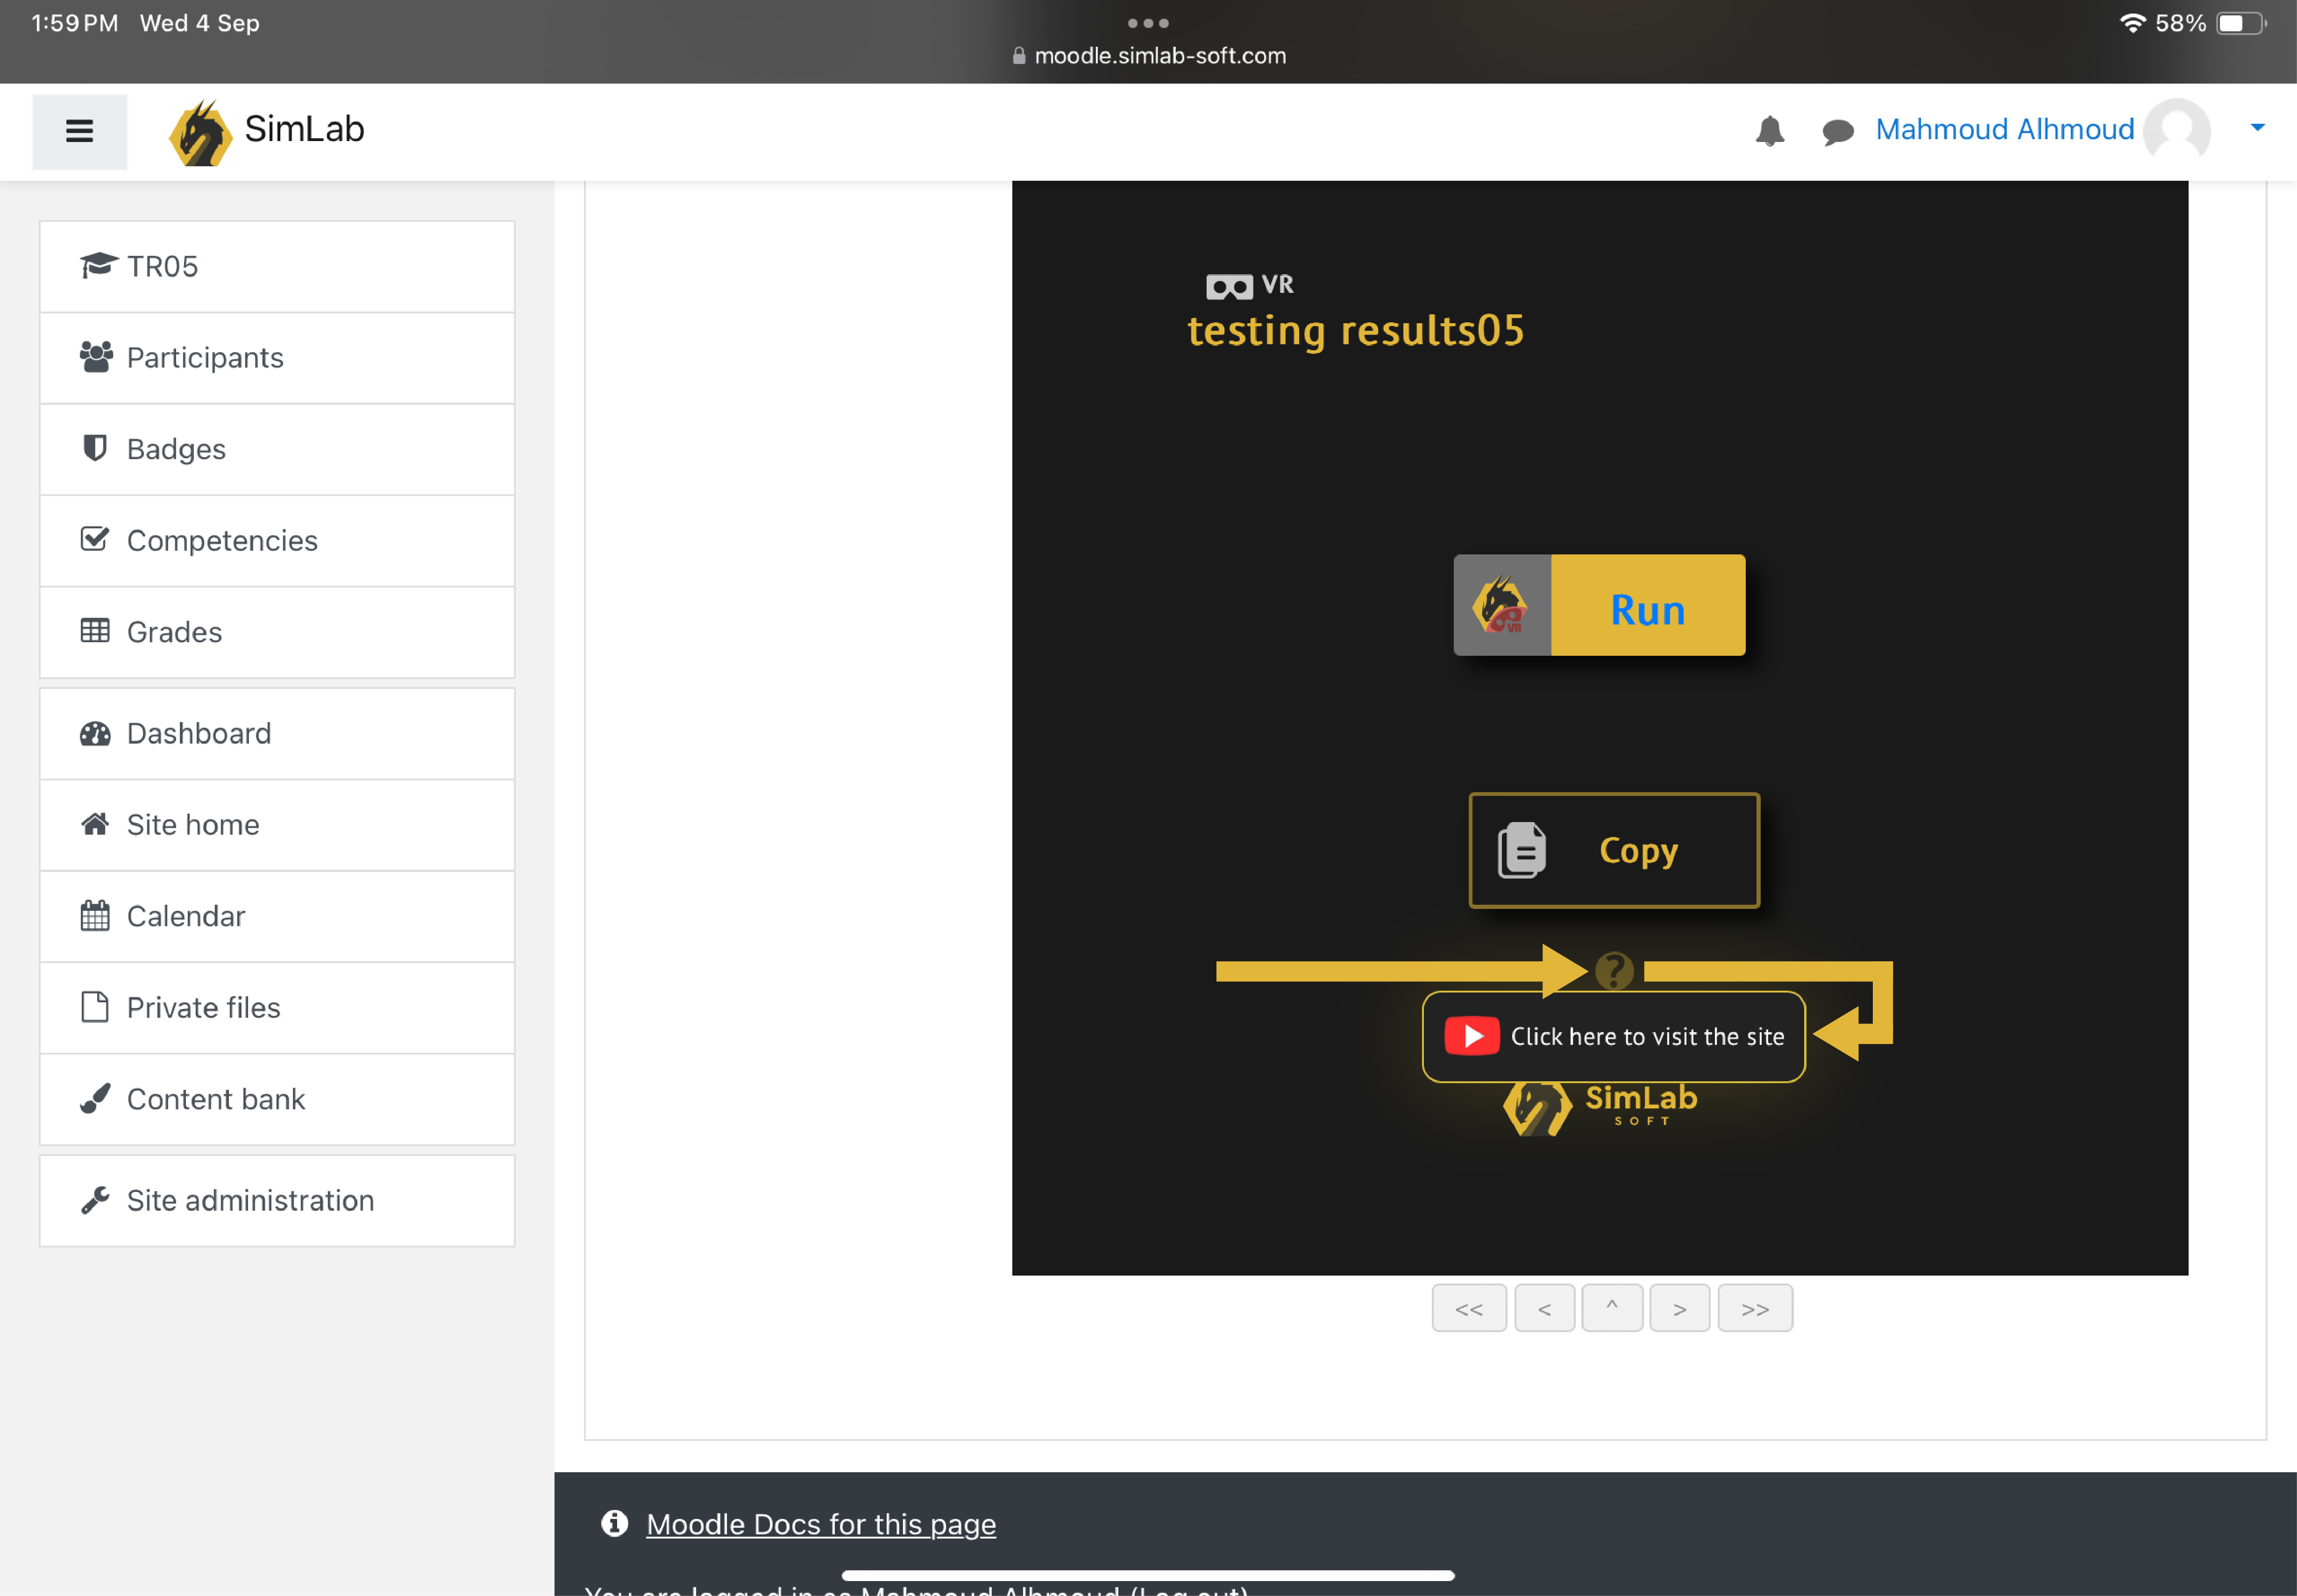
How to come back to this help page through the lesson page:
You can come back to this page by hovering over the question mark icon then pressing on "click here to visit the site" indicated below
VR Viewer Settings

Graphics Quality
Users can control the rendering quality from the viewer settings.
If Running a PC with good video card on desktop the user can switch to Ultra rendering, which takes advantage of the new lumen rendering in unreal 5.
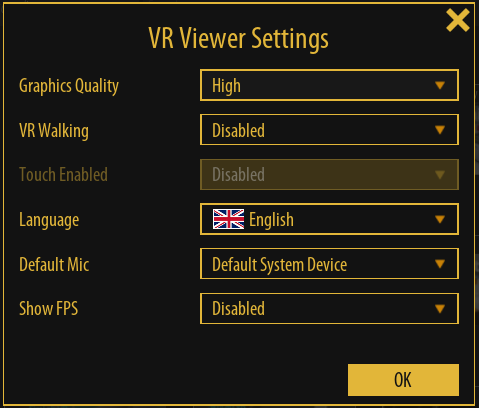
VR Walking
Enable/disable walking with controllers in VR.
Touch Enabled
Enable touch screen (if using a PC connected to a touch screen)
Language
Select the interface language (Users in different countries asked for that).
Default Mic
Select the default Mic for notes, and voice commands
Show FPS
Show/ hide FPS counter on the screen
If the user finds experiences to be slow for providing great FPS for standalone VR headsets, some options can be changed from the composer when making the experience, check the last segment of this page
Accessing files on Quest, Android, Pico, and iOS without a network connection
