SimLab VR Viewer for Clients
- Signing In
- Running Shared VR Experiences
- VR Experience Navigation and Interactions
- VR Menu
- VR Viewer Settings
- Accessing files on Quest, Android, Pico, and iOS without a network connection
- Mixed Reality Collaboration Support
Signing In
If you're a client and someone has shared a VR Model with you, you will receive an email requesting you to activate your account to view the shared model.
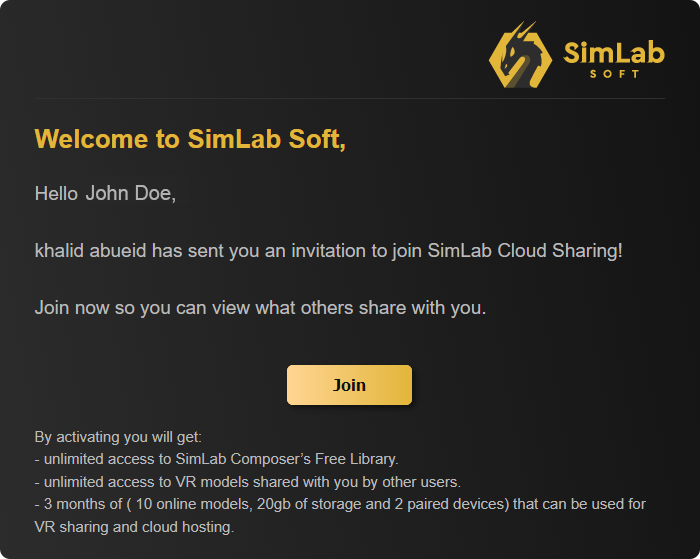
From the received email, click Join.
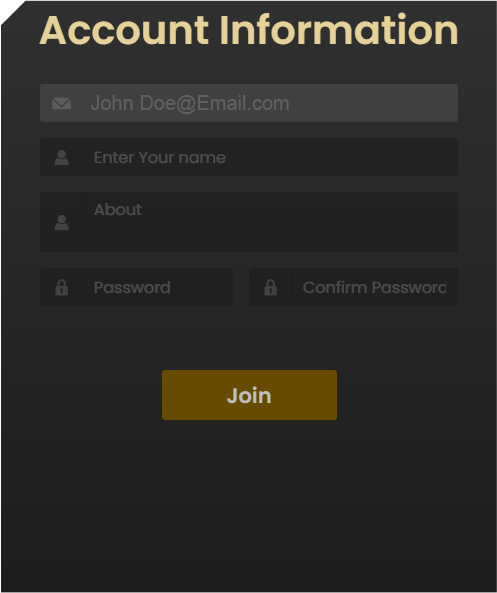
once you click Join, the account information dialog will appear.


Running Shared VR Experiences
Accessing the Shared VR Experience
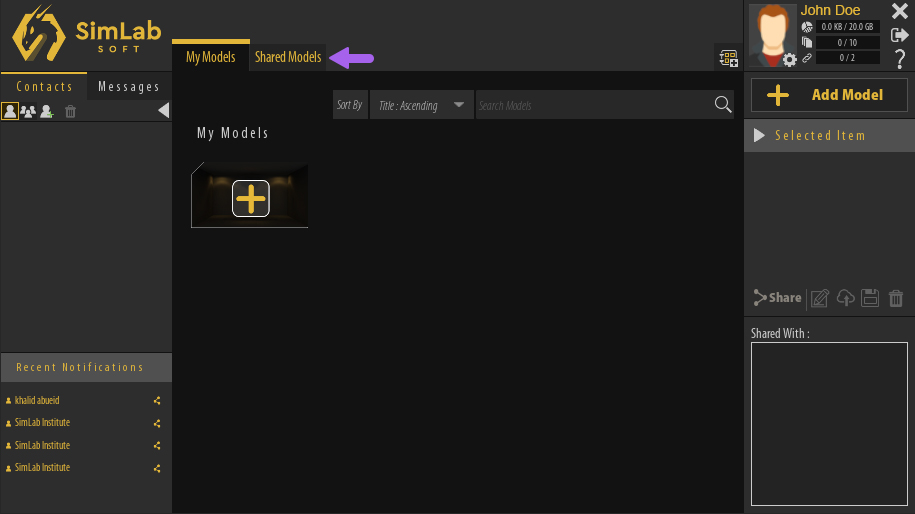
Once you are Signed in to your account in SimLab VR Viewer, click on the Shared Models tab.
Running The VR Experience
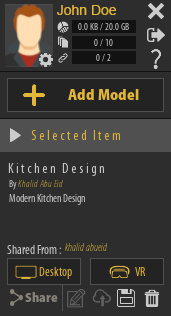
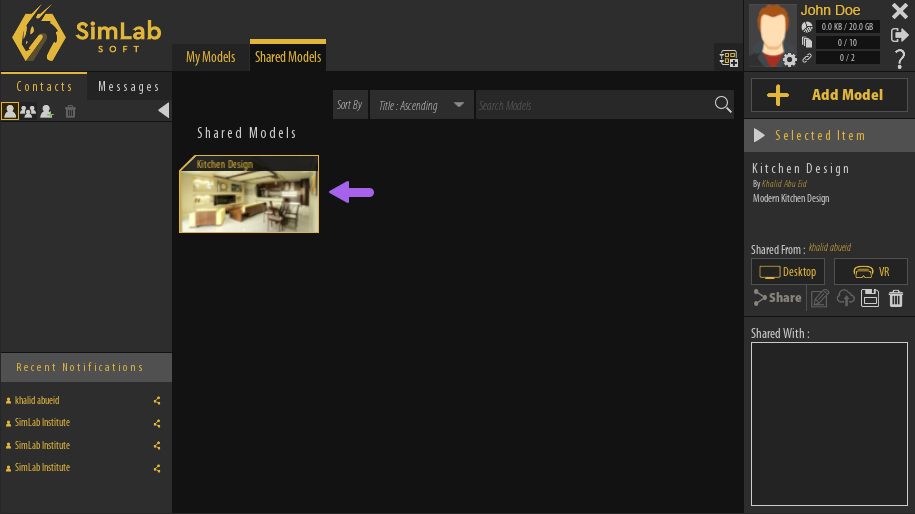
Once a VR Experience has been selected, its name and description along with the name of the person who shared it with you will be displayed in the Selected Item Panel to the right, additionally, you will find 2 buttons to run the experience in Desktop Mode or VR Mode.
Desktop Mode
If you are using a Windows or MacOS computer and you do not have a VR headset, you can run VR Experiences in Desktop Mode where you will be using the mouse and keyboard to navigate the scene and interact with objects.
VR Mode
With VR Mode you can run the VR experience using PC VR headsets which are VR headsets that are attached with a cable to a computer.
Supported VR devices are :

HTC Vive / HTC Vive Pro

Oculus Quest / Oculus Quest 2 / Oculus Rift / Oculus Rift S

Pico Neo 2 / Pico Neo 3

Pairing Wireless Devices
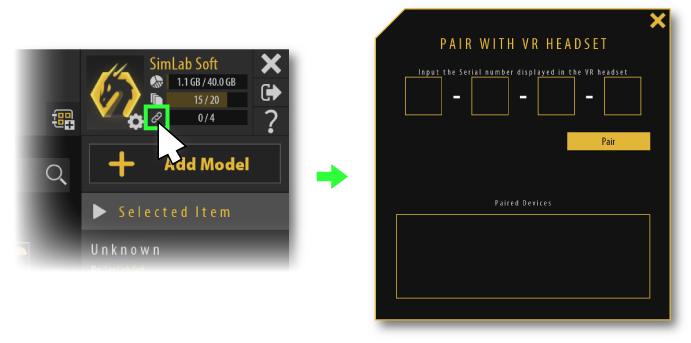
2. Run SimLab VR Viewer on the wireless device and click on Sign in at the top Right corner
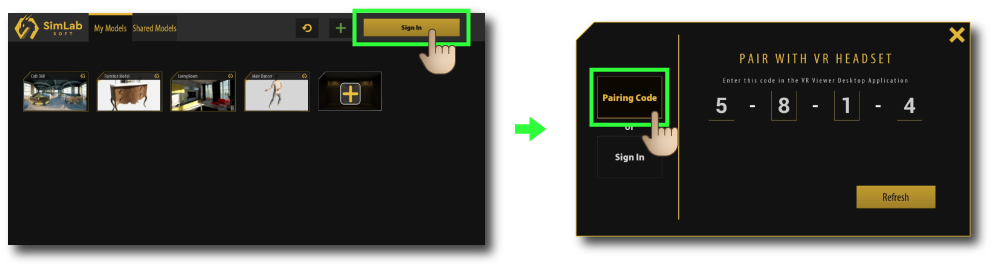
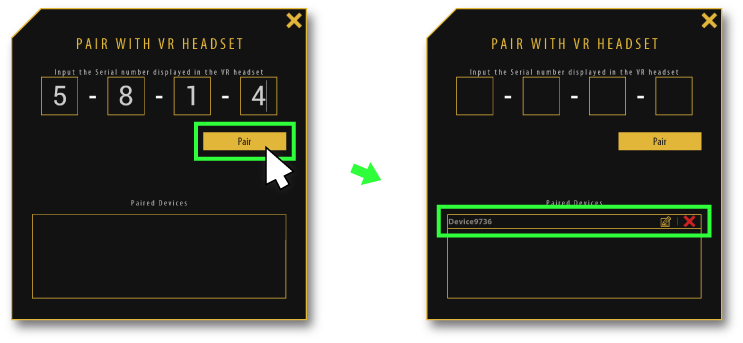
3. Insert the pairing code that shows on your device into your PC.

4. Click pair, then the device should appear on the pairing devices list, you can rename it or delete it from this list as well.
5. click the Refresh button on your device, then all of the shared models will be displayed.
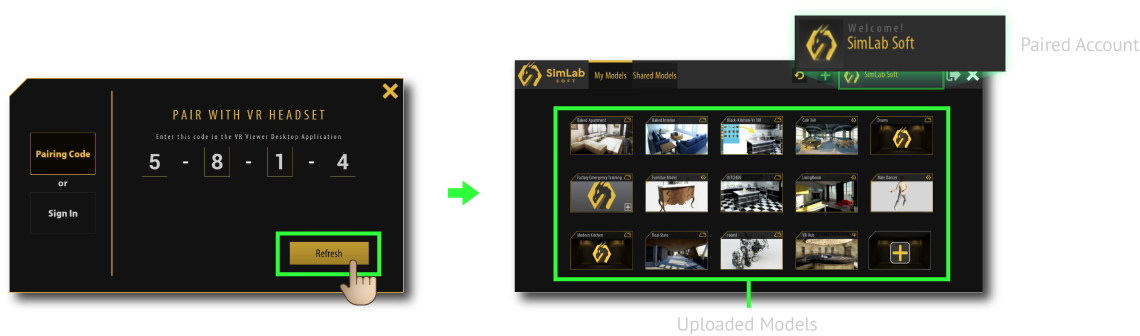
6. Select the desired model to run it on the wireless device.
VR Experience Navigation and Interactions
Desktop Mode
If you are running the VR Experience in Desktop Mode, you are going to be using the mouse and keyboard to navigate the scene and interact with objects.
Watch This tutorial to learn about Desktop navigation
Movement
Move around : W A S D keys or the Arrows on the keyboard.
Sprint : Hold Shift on the keyboard while moving.
Look around: Move the mouse.
Jump : Spacebar.
Trigger objects
To trigger an object in the scene, hold the left click and aim towards an object then release to trigger it.
Grabbing and Grabbable Sequences
To grab objects freely or to use Grabbable Sequences, aim at an object then right click to reveal the grabbing hand, then hold left click to grab an object.
VR Mode
If you are running the VR Experience in VR Mode, you are going to be using the Controllers to navigate and interact with objects.
Watch This tutorial to learn about VR navigation
Movement
Move around :
- Physically moving around will move you in VR.
- Use the Arrows or W A S D on the Keyboard (when VR is connected to PC).
Look around :
- Move your head physically to look around you in VR.
- Move the joystick or the track pad left and right.
- Move the Mouse (when VR is connected to PC).
Teleporting : Hold the joystick or the trackpad on your controller then aim towards a location on the ground then release to teleport there.
Flying : When flying is enabled, push the joystick or the trackpad on the left controller and aim the joystick in the direction you want to fly.
Trigger objects
To trigger an object in the scene, hold the trigger button on the controller and aim towards an object then release to trigger it.
Grabbing and Grabbable Sequences
To grab objects freely or to use Grabbable Sequences, touch the virtual controller in VR to the target object and while it intersects the object hold the trigger button on the controller.
VR Menu
During the VR Experience you can display the VR menu to perform a variety of tasks, and whether you are in Desktop Mode or VR Mode, the functions within the menu are the same, but they are arranged differently to suit the platform you are using.
Accessing the VR Menu
To display the VR Menu in Desktop mode: Press the middle mouse button or the mouse wheel.
To display the VR Menu in VR mode: Press the menu button on the VR controller.
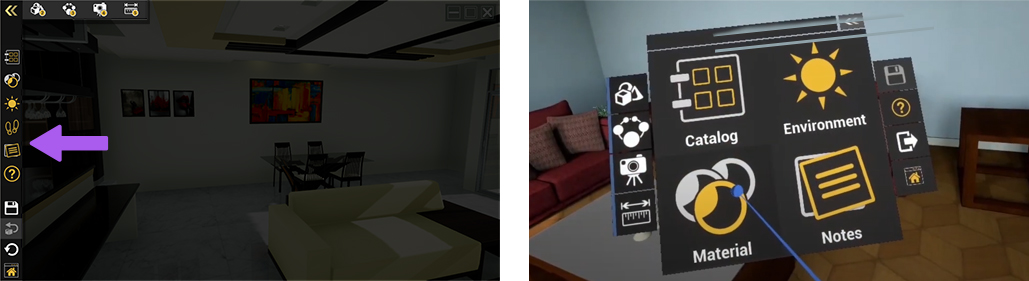
VR Menu in Desktop Mode (Left) appears to the left of the screen, while in VR Mode (Right) it appears in front of the user.
VR Menu Functions
 Catalogs
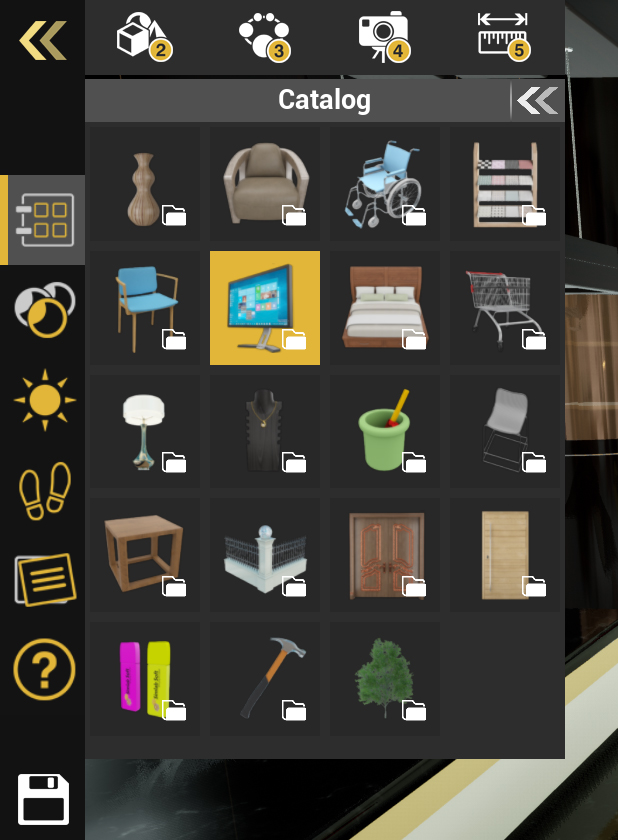
Catalogs when implemented in a VR Experience, will include 3D models that can be imported to the VR Experience.
Upon selecting one of the models, it will begin downloading, and while it does so, you can position the model anywhere in the scene.
 Materials
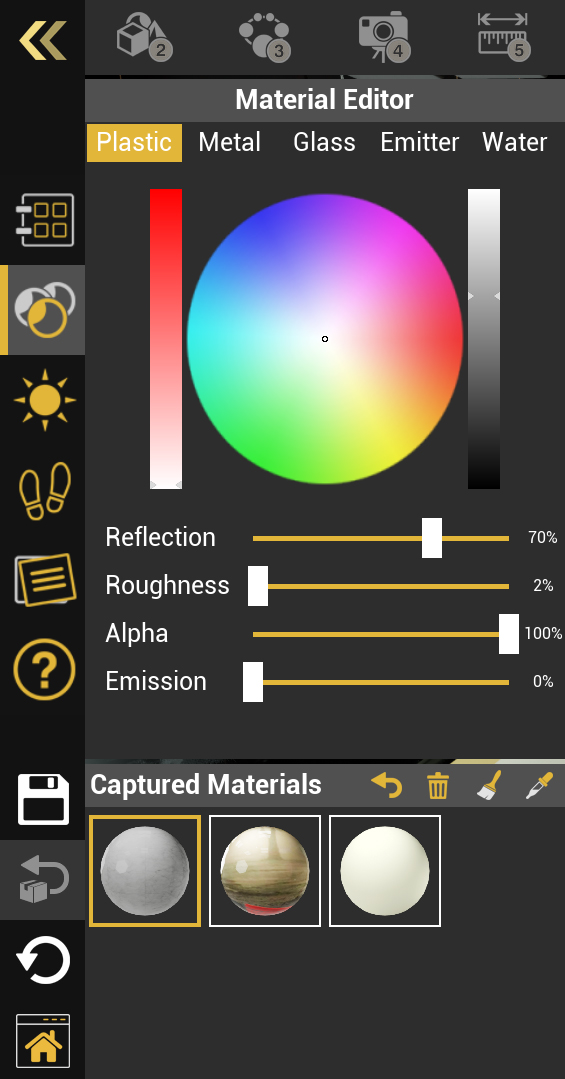
After accessing the material panel, select an object in the scene to display its material, after which, you will be able to modify it.
Each material type available (Plastic, Metal, Glass, Emitter and Water) will have different attributes that you can modify to alter the appearance of the object.
From the Captured Materials panel, you can store materials that are used by objects in the scene as a palette and then apply the stored materials to other objects in the VR Experience.
 Environment
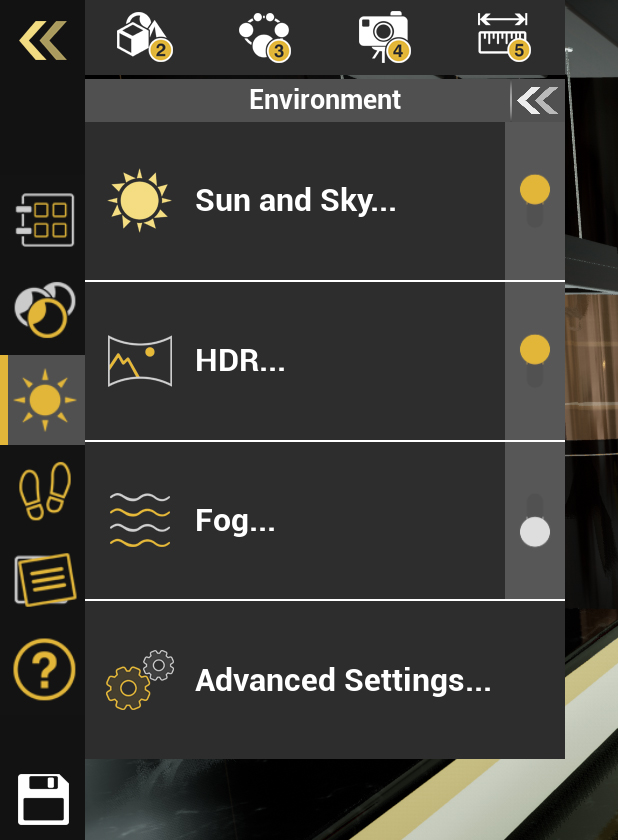
From the Environment panel you can access the settings for:
- Sun and Sky
- HDR Image
- Fog
- Advanced Settings
You can also toggle each of these systems on and off by pressing the switch to the right of each system.
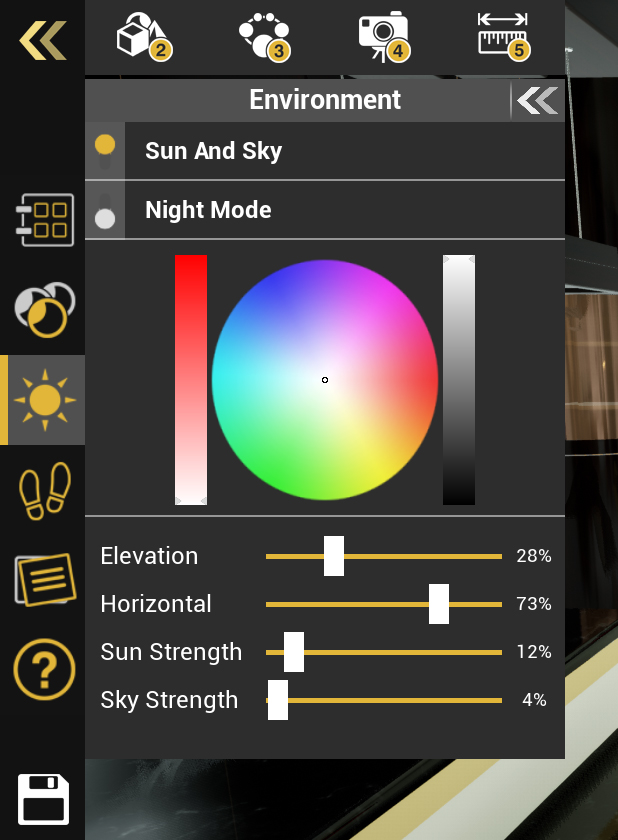
From the Sun and Sky sub-menu, you can toggle the system on or off, as well as enable night mode which would mimic a night lighting environment.
You can also control the sun and sky color hue by using the color wheel and the sliders next to it.
To control the sun's position in the sky, adjust the Elevation and the Horizontal sliders. Changing the sun's position will affect the sun disc's location in the sky, as well as the direction of the light emitted by the sun.
The Sun Strength controls the strength of the direct light rays coming from the sun, while the Sky Strength will affect the over all ambient light emitted from the sky.

HDR images use Bitmap images to light the scene, and it can work together with the Sun and Sky system or independently from it.
In addition to color, you can also adjust the brightness of an HDR image.

Fog is a volumetric environment effect that can make the natural phenomena of fog or haze in the scene.
You can also adjust the starting distance of the fog which controls how close to the user the fog is, and when set to 0, the fog starts where the user is standing in the VR Experience.

The Advanced Settings menu of the Environment settings will enable you to change the Lights Power in the VR Experience, which controls the strength of all artificial lights such as Spotlights, Area lights, IES lights and Point lights and it will not affect the Sun and Sky nor the HDR lighting.
Exposure, simply put, controls the overall brightness of the VR Experience, with higher values more brightness will be introduced to the scene, while with lower values, the scene would appear darker.
The Background Type determines what backdrop to display in a VR Experience. having it set to environment will either display the Sun and Sky or HDR image, while when set to color, a single solid color will be displayed, and with the Image option, a 2d Image will be displayed.
 Navigation
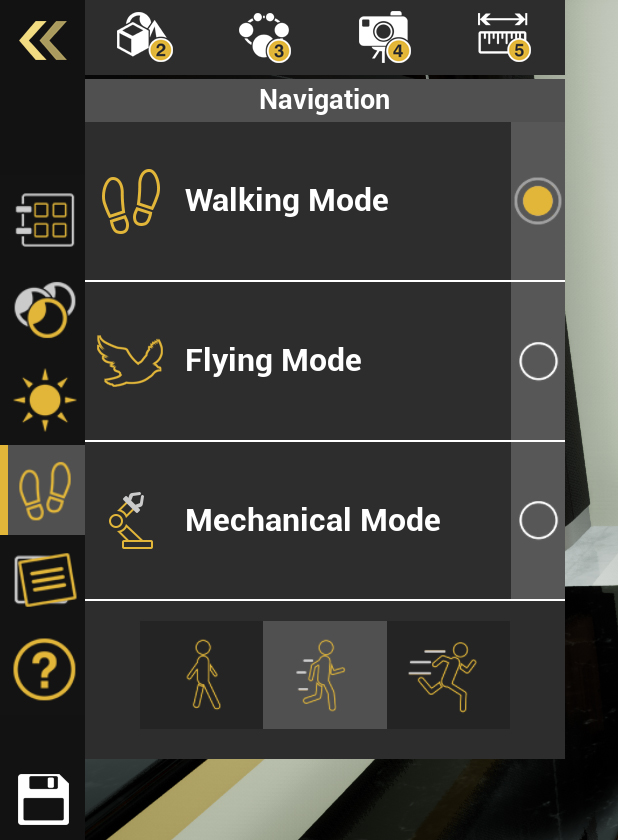
- Walking Mode: In this mode the user will travel on flat surfaces as if he was walking and will collide with objects in the scene.
- Flying Mode: With flying mode, the user can elevate upwards without the effect of gravity, and collision bypassed if the VR Experience creator set it to be so.
- Mechanical Mode: In mechanical mode, the user can rotate around an object and zoom in an out of it by double clicking that object to focus on it.
 Notes
Notes

Using the Pencil icon, you can draw on objects in 3D space to mark them. The lines you draw are exclusive to the selected note and will not appear unless that note is accessed.
In the text field, the user can type his note in writing.
Using the record button, the user can add a voice note through the microphone, and from the combo box beneath the button, he can choose the recording device.
 Help
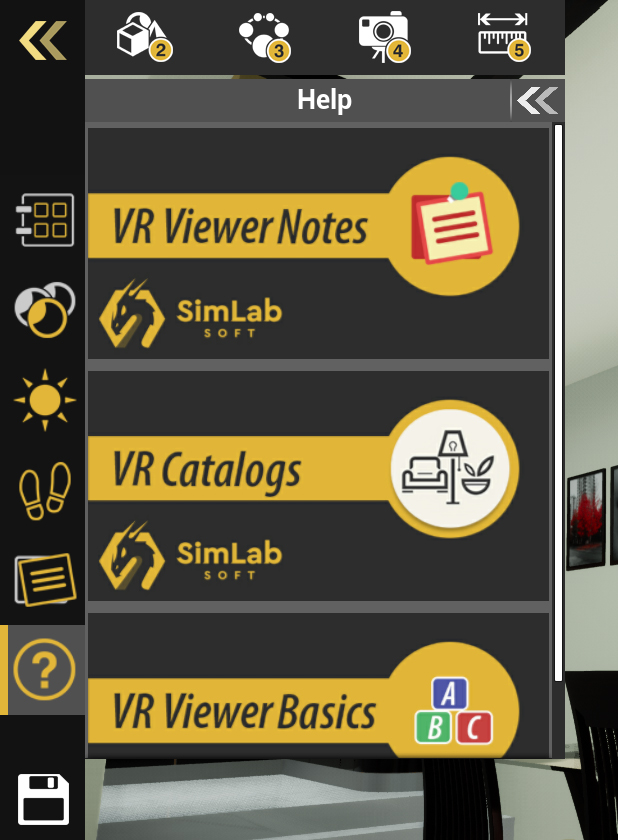
Help
 Save
Save
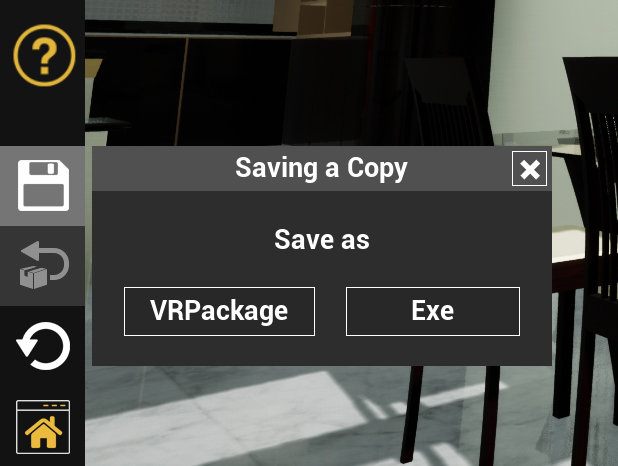
When the Save option is enabled by the VR Experience creator, you will be able to save the VR Experience along with any modification made as either a "VRPackage" which is the native format for the VR Viewer files, or an "Exe" file.
The saved files can later be opened or shared with others either via SimLab VR Viewer or through traditional file communication mediums.
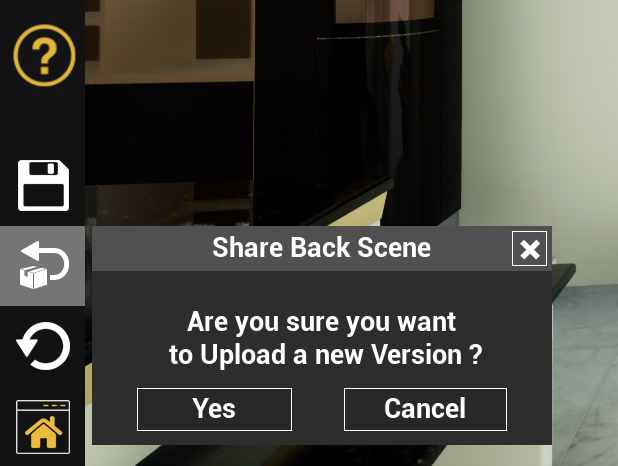
 ShareBack
 Reload
Clicking Reload will restart the VR Experience, erasing any modifications or progress made through the experience.
 Home
Home
Pressing the Home Button will send the user back to the homepage of SimLab VR Viewer, where he can browse different VR Experiences.
 Scene Building Mode
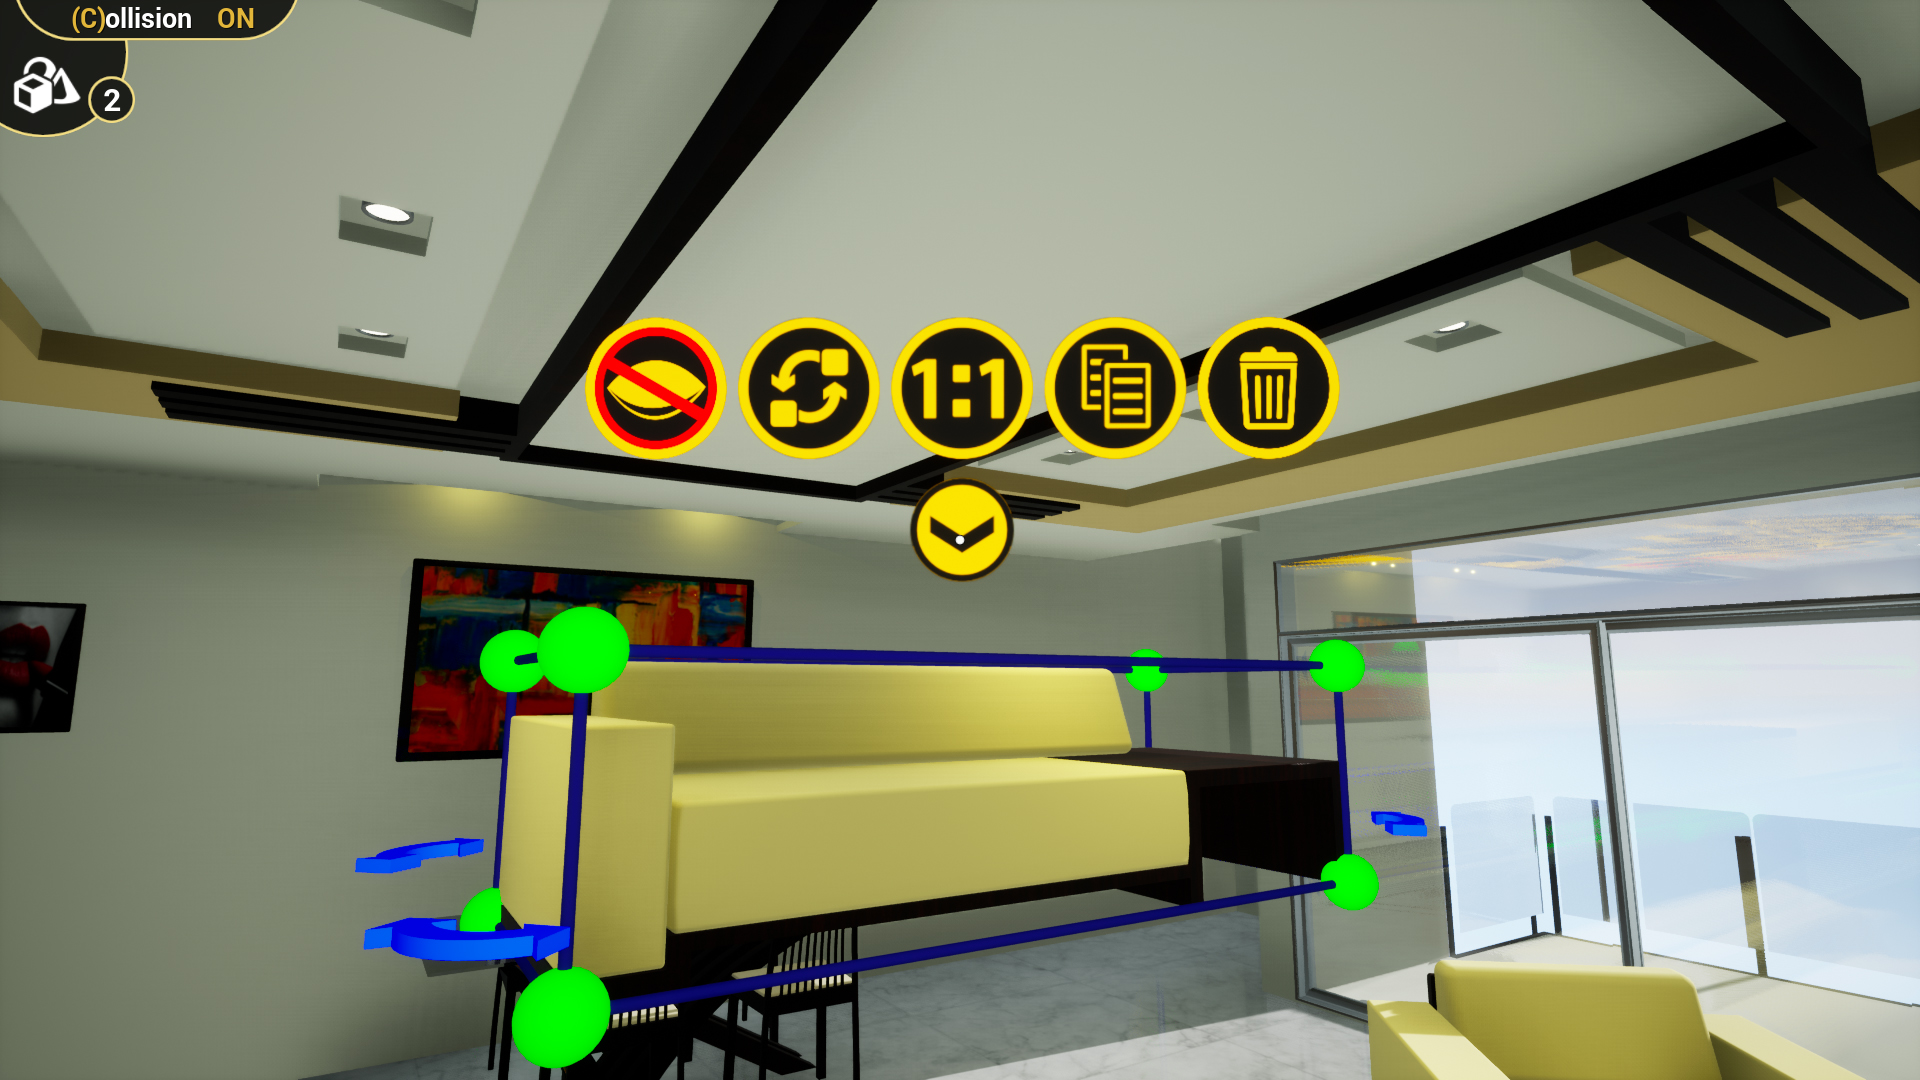
When entering the scene building mode, any grabbable objects in the scene become interactive objects where you can :
Move the objects: Aim at the object and hold left click or the controller trigger in VR to move the object around in the scene.
Scale the Object: Using the left mouse button in Desktop Mode or the trigger button in VR Mode, drag the green spheres around the object to scale it up and down.
Rotate the Object: Using the left mouse button in Desktop Mode or the trigger button in VR Mode, drag the blue arrows surrounding the object to rotate it in the respective direction.
Hide/Show the Object: Click on the visibility button to hide or show the object in the scene.
Replace the Object: Click on the replace button then select a second object in the scene to replace the first object with the second object.
Reset the Object: Resets the scale of the object to its default size.
Copy the Object: Creates a replica of the object which later you can modify while maintaining the attributes of the original object.
Delete the Object: Removes the object from the VR Experience permanently.
 (Lists) Visualize Scene Options
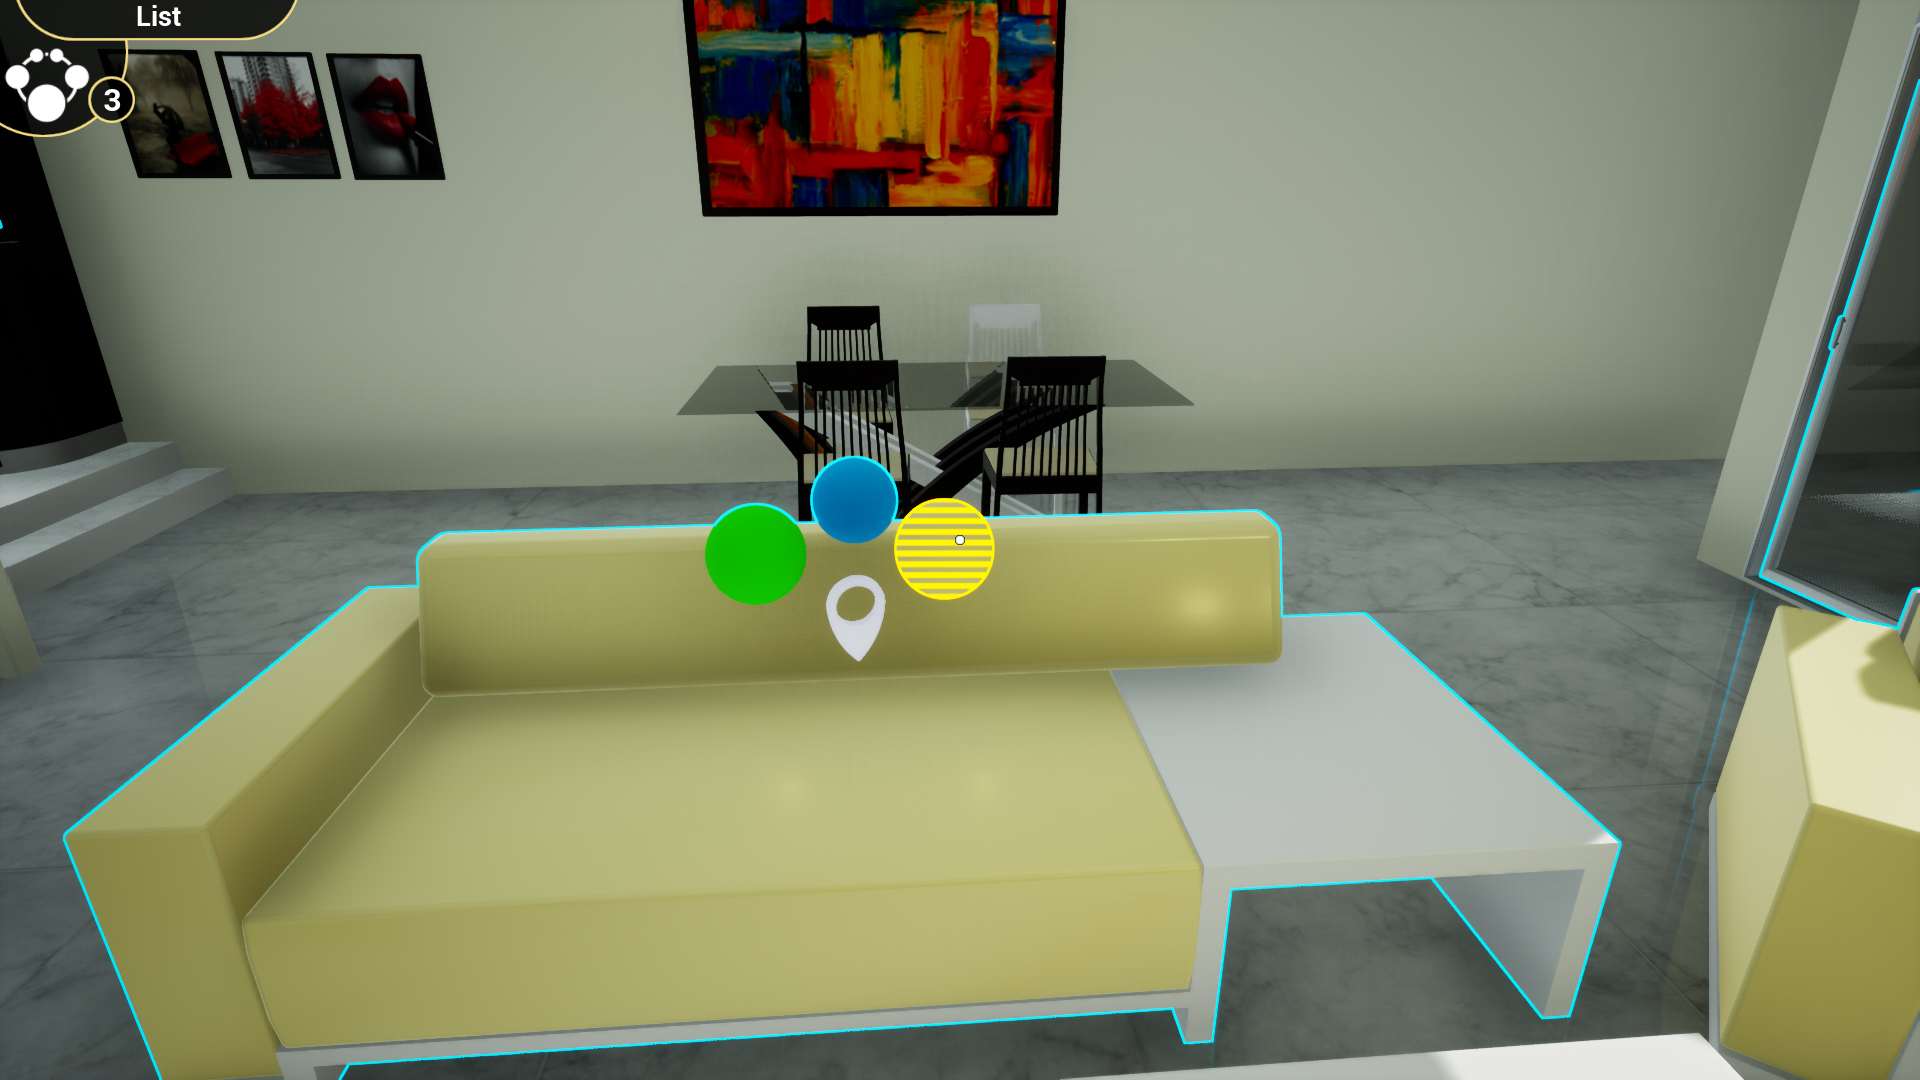
If there are any lists implemented in the VR Experience, accessing this mode will display all the lists pins, which when triggered, will reveal options for the target model.
Lists can include:
- Different materials of an object.
- Different attributes for an object (Position, Scale and Rotation).
- Different animation sequences.
- Multiple object replacement options.
 Large Scene Navigation Mode
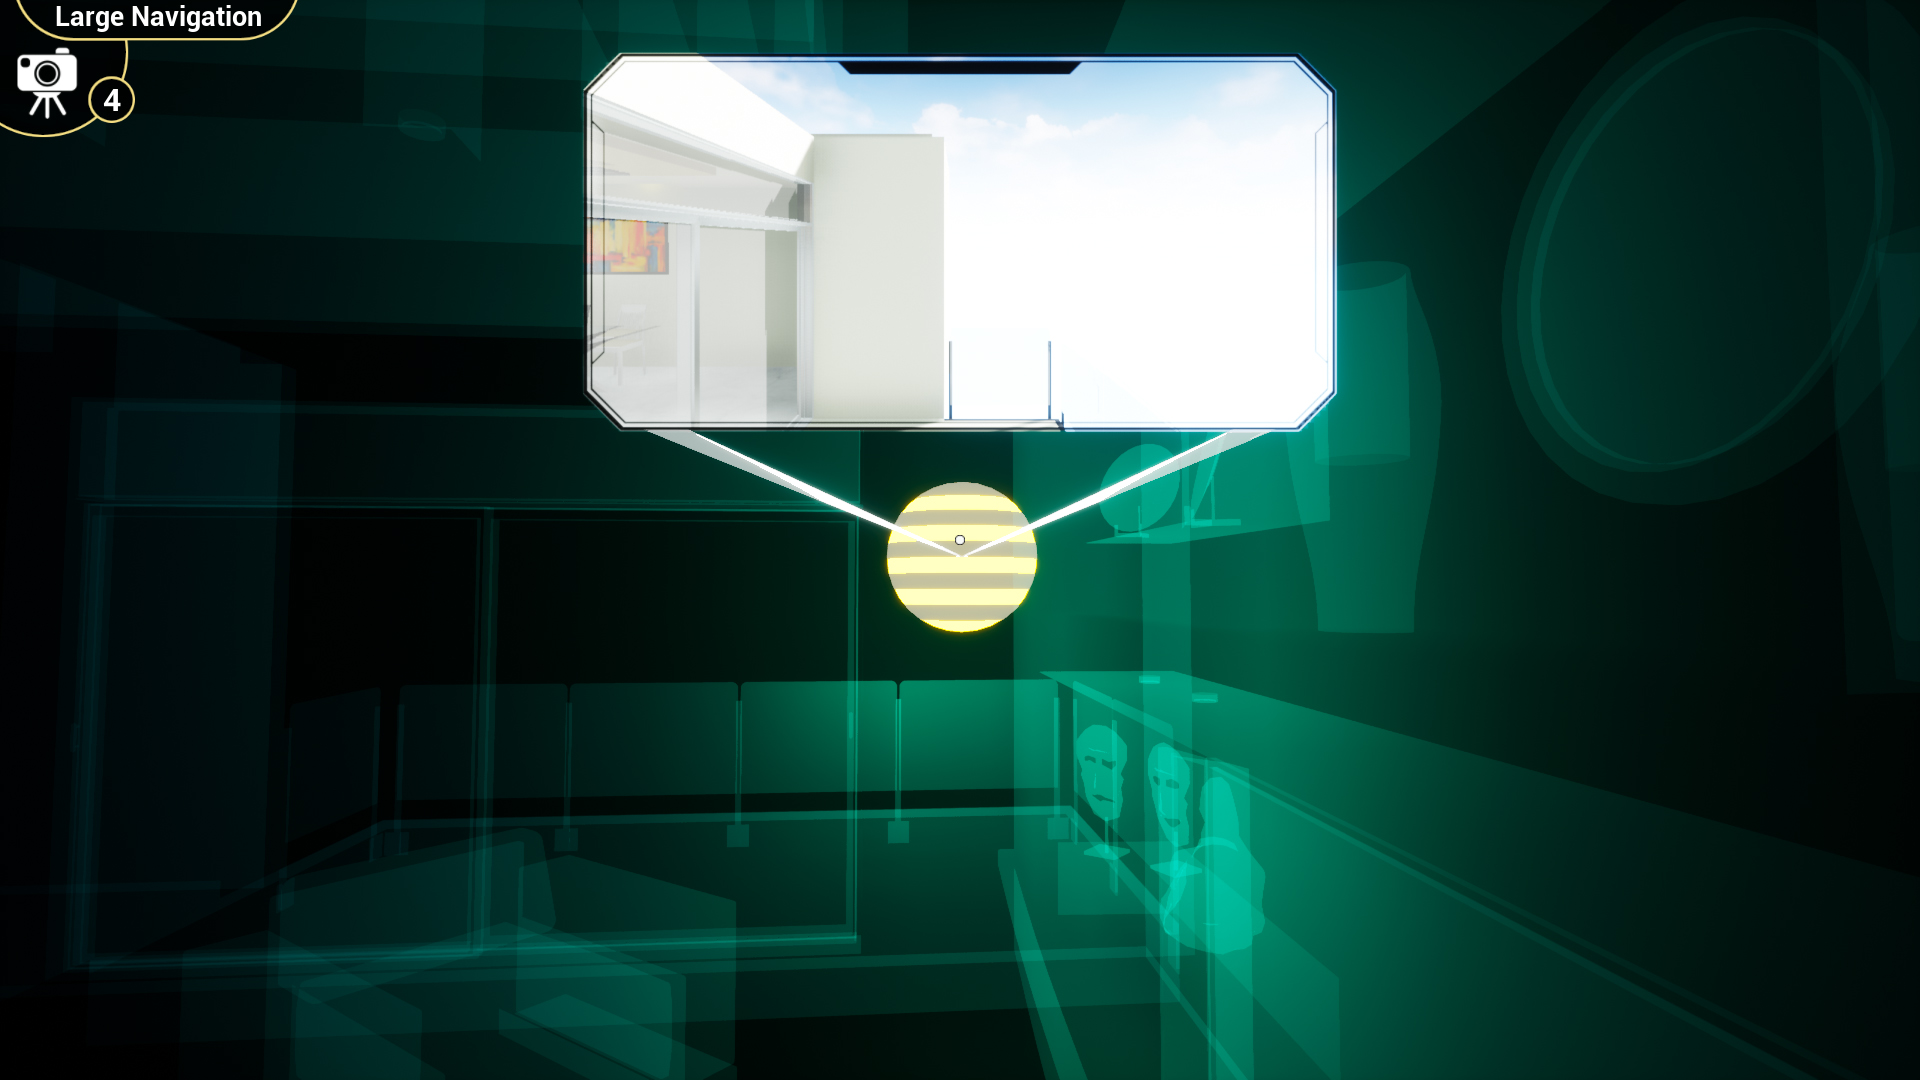
This mode can only be accessed if there are Teleportation Cameras in the scene, once the mode is activated, the objects in the VR Experience will become semi-transparent with a green hue and glowing spheres will appear.
Upon hovering over the spheres, a view of where the sphere will teleport you to, will be displayed, and once you click the sphere, you will teleport to its location.
 Measurements Mode
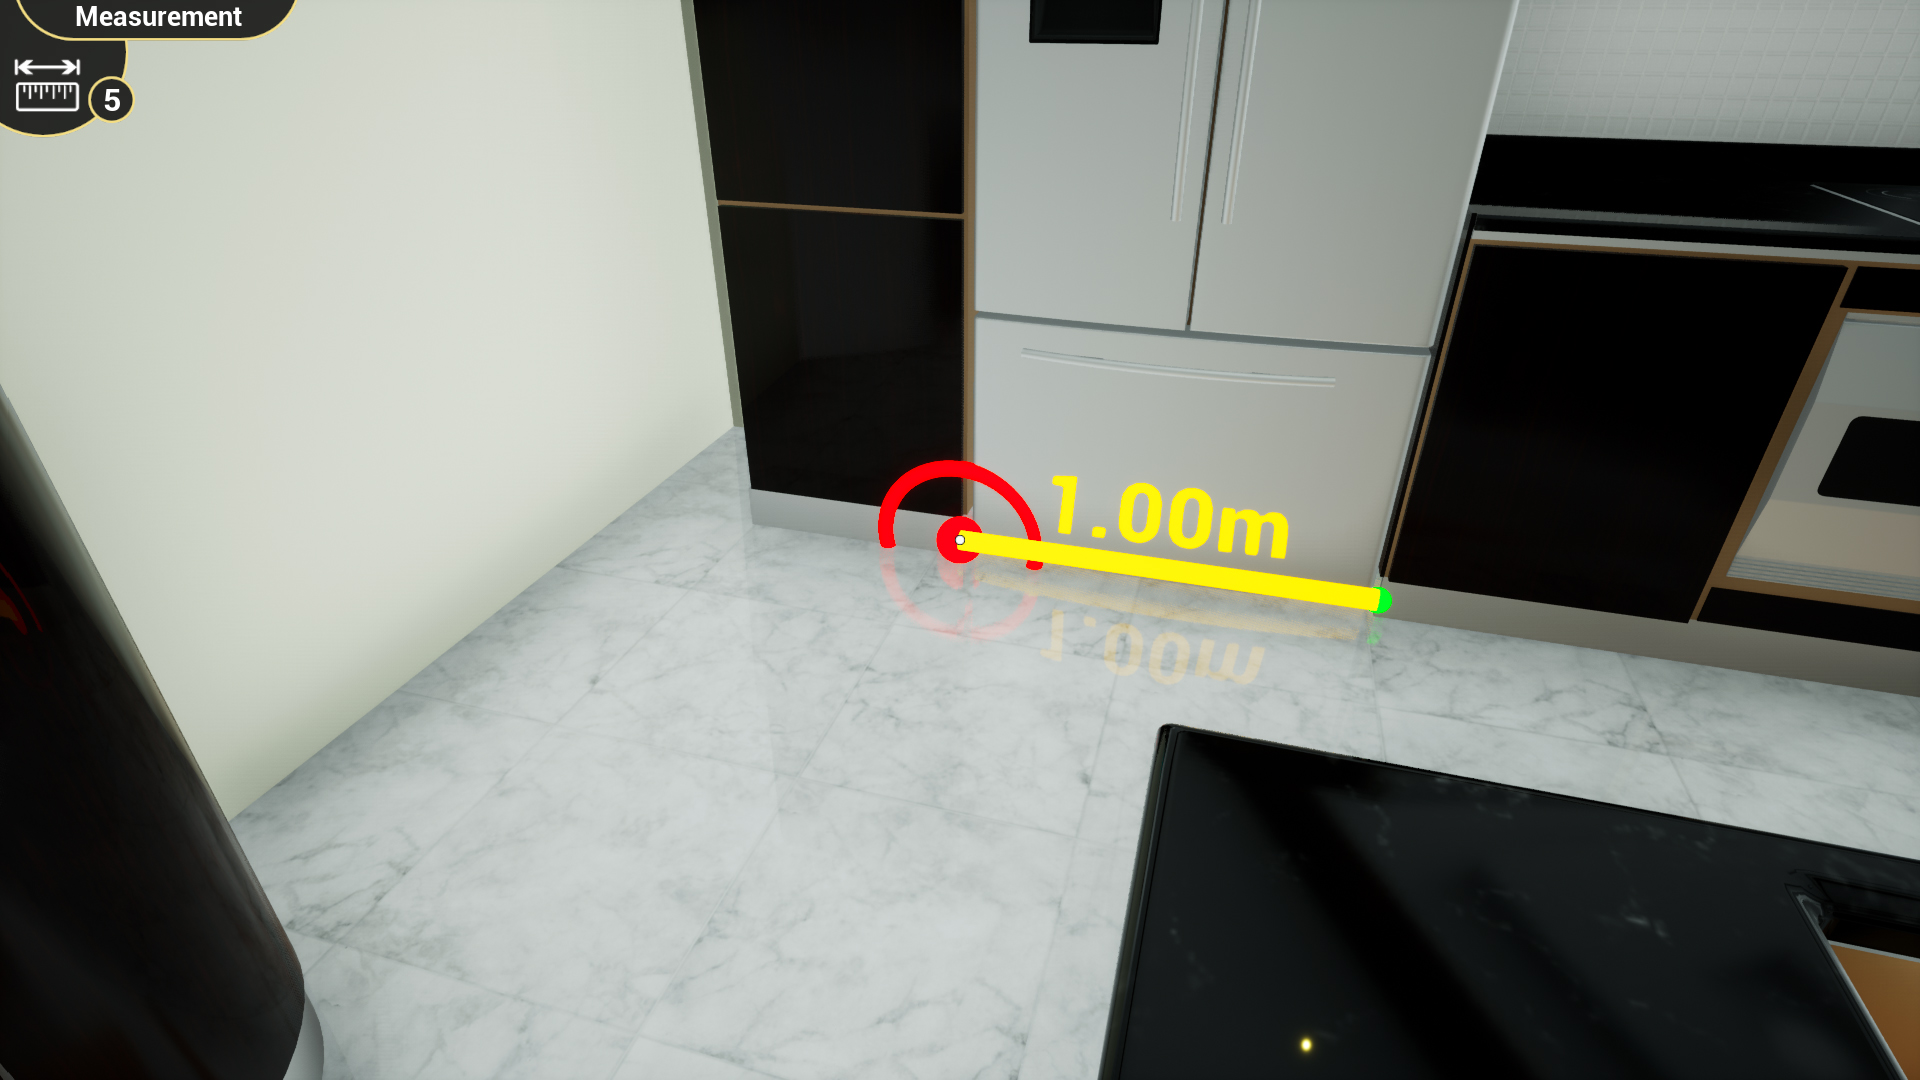
In the Measurements mode, the user is able to measure distances between points on objects in 3D space.
In VR Mode, hold the trigger on the right hand controller and drag the controller to take a distance between the points, and use the trigger on the left hand controller to erase the created measurement when needed.
In Desktop Mode, hold the left click and drag the mouse to take a distance between the points, and use the right click to erase the measurement when needed.
VR Viewer Settings
Graphics Quality
Users can control the rendering quality from the viewer settings.
Running a PC with good video card on desktop the user can switch to Ultra rendering, which takes advantage of the new lumen rendering in unreal 5.
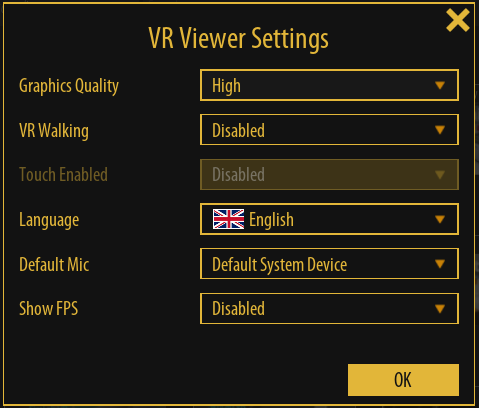
VR Walking
Enable/disable walking with controllers in VR.
Touch Enabled
Enable touch screen (if using a PC connected to a touch screen)
Language
Select the interface language (Users in different countries asked for that).
Default Mic
Select the default Mic for notes, and voice commands
Show FPS
If the user finds experience to be slow for providing great FPS for VR, the value can be lowered in settings to get a smooth VR Experience.
Accessing files on Quest, Android, Pico, and iOS without a network connection
