Medical VR Guide
Learn how to acquire, access and run medical VR Experiences on different platforms successfully.
- Requesting Trial
- Running Medical VR Experiences
- Interactions and Navigation
- Purchasing Medical VR Experiences
Requesting Trial
Welcome to our comprehensive guide designed to help you navigate the process of requesting trials, purchasing, and running our VR Medical Experiences. Whether you're exploring our cutting-edge simulations for the first time or looking to integrate them into your practice or educational setting, this guide will walk you through each step. From understanding how to request a free trial of our VR Experiences, to making a purchase, and finally, to setting up and running the simulations on your devices—this guide has you covered. We are committed to ensuring that you have a seamless and rewarding experience with our VR solutions.
Requesting a Trial
We are pleased to offer you the opportunity to explore our VR Medical Experiences through a 1-month free trial. You can select up to three VR simulations to experience during this period. To get started, simply click here to request your trial. This trial allows you to fully immerse yourself in our VR content, helping you to evaluate how our solutions can benefit your practice or educational environment.

Upon requesting trial, you will need to fill a simple form with a working email address and select 3 VR Experiences to gain access to
Once you’ve submitted the trial request form, a SimLab account will be created for you using the email address you provided. You will receive an email containing your account password, which you will use to access the VR Experiences you selected. This account will serve as your gateway to the trial experiences, allowing you to easily explore and interact with the content.
Getting familiar with the requested VR Experiences
We recommend that you watch the videos of the VR Experiences you selected from the available options. This will help you become familiar with the experiences and ensure a smoother and more engaging trial.
Auscultation of the heart
General cardiovascular examination
Examination of the upper limb
Injection administration examination
Peripheral IV Line insertion
Vital Signs
CPR
Next : Running the Medical VR Experiences
Running Medical VR Experiences
SimLab Medical VR Experiences are designed to be versatile and can be run on multiple platforms, including desktop computers, PC VR headsets, standalone VR headsets, and mobile devices. To get started, simply install the free SimLab VR Viewer on the platform of your choice.
SimLab VR Viewer
The SimLab VR Viewer is a free-to-use application available on multiple platforms and devices. It enables users to run, share, and even join multi-user VR sessions with ease. Whether you're on a desktop, VR headset, or mobile device, the SimLab VR Viewer provides a seamless experience, allowing you to fully engage with our medical VR content.
Desktop Mode
SimLab VR Viewer is designed to run smoothly on both PC and Mac, ensuring broad accessibility and flexibility for various users. This cross-platform compatibility guarantees that you can fully experience the immersive VR content, regardless of the operating system.
- Click here to download SimLab VR Viewer and then install it on your Desktop computer.
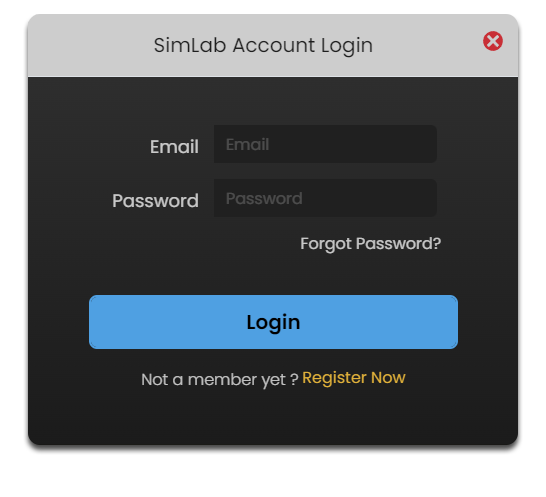
- Once you have installed SimLab VR Viewer, click on the Sign in button in the top-right corner and enter the username and password SimLab Soft has provided you with.
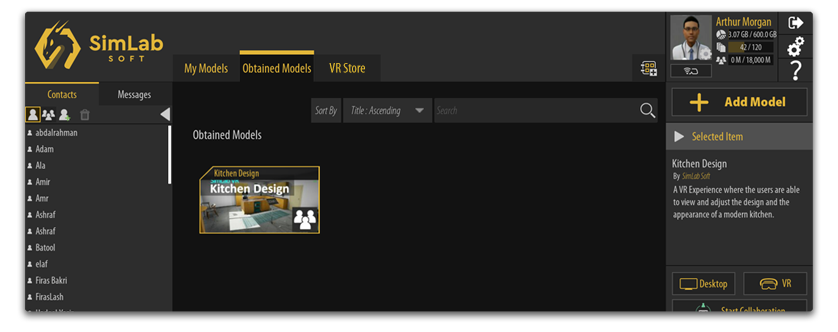
- After logging in, go to the Obtained Models tab to find the VR Experiences you have been granted access to.
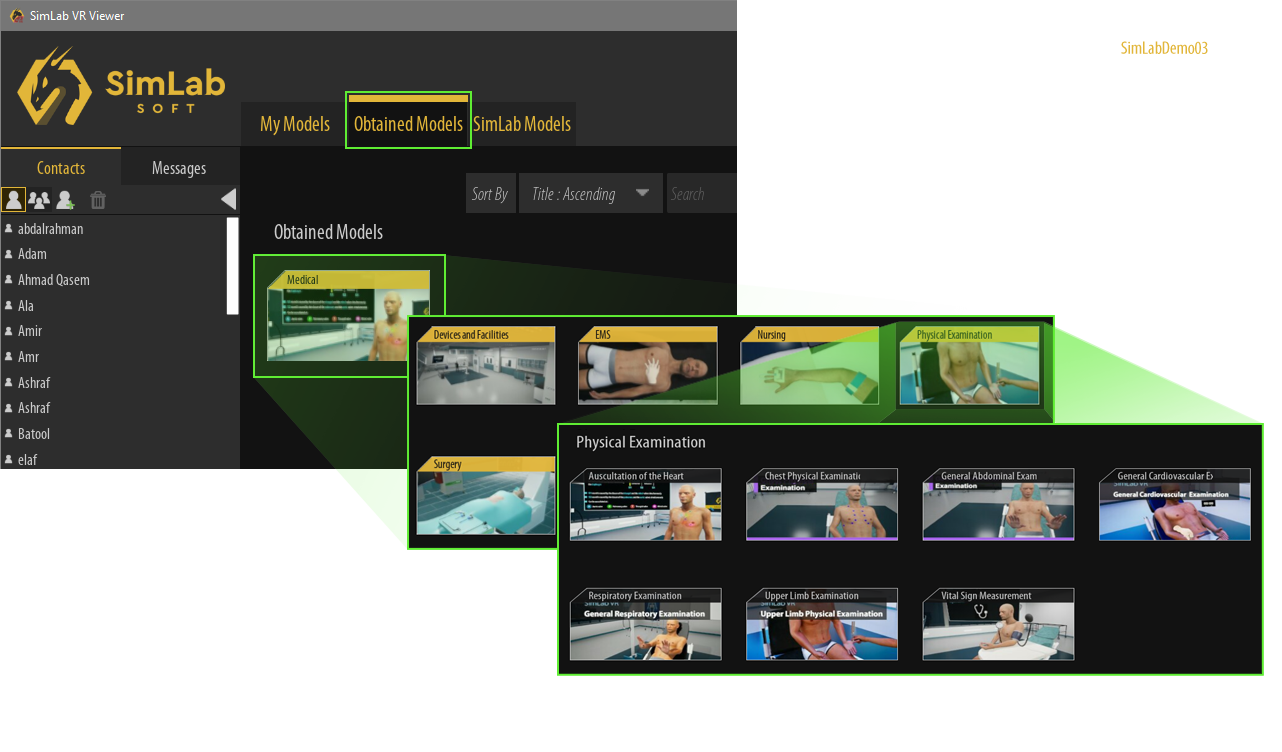
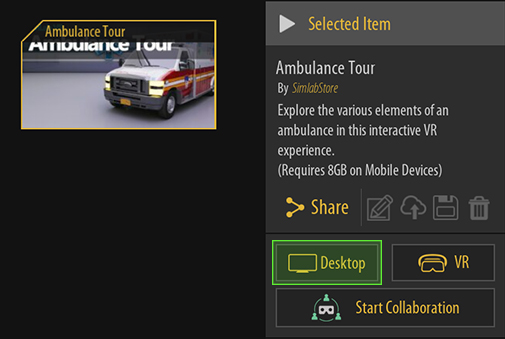
- Now select the VR Experience and from the panel to the right, click on Desktop.
PC-VR mode
PC-VR mode allows you to run the VR Experience on a VR headset connected to a PC through the SimLab VR Viewer software that is installed on the computer. This mode provides a fully immersive experience and achieves the highest quality of VR viewing possible. The quality and performance in PC-VR mode rely heavily on the specifications and capabilities of the connected computer rather than the VR headset itself. This means that with a powerful PC, you can enjoy enhanced graphics, smoother performance, and a more detailed and realistic VR environment, offering your clients an unparalleled virtual reality experience.
The supported VR devices when running this mode are: HTC Vive, HTC Pro, VIVE XR Elite, Oculus Quest 2, Oculus Quest 3, Oculus Quest 3S, Oculus Quest Pro, Oculus Rift, Oculus Rift S, and All Windows Mixed Reality devices.
To run the VR experience in PC-VR mode, similar to Desktop mode:
- Run SimLab VR Viewer on your Desktop computer
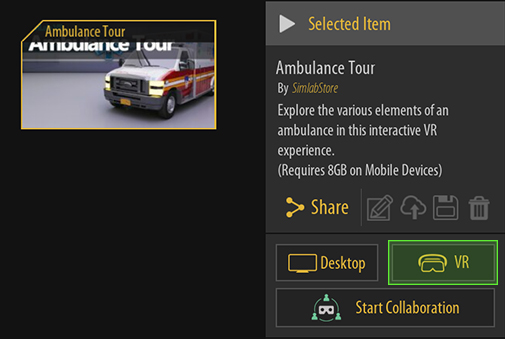
- Navigate towards the VR Experience you wish to run and then select it
- From the panel to the right, select VR.
Standalone VR Devices
SimLab VR Viewer is also compatible with standalone VR devices, offering an alternative solution that eliminates the need for a computer during presentations. This flexibility not only streamlines the setup process but also enhances mobility, allowing you to run the VR Experience in various environments without being tethered to a computer. With standalone VR devices, you can effortlessly transport and showcase immersive VR content to clients, ensuring a seamless and engaging presentation experience.
The supported standalone devices are : Pico Neo 3, Pico G3, Pico 4, Pico 4 Pro, Oculus Quest 2, Oculus Quest 3, Oculus Quest 3S, Oculus Pro.
To run VR Experiences on standalone devices, you need to first install SimLab VR Viewer on the devices, following this, we will delve into the specifics of installing SimLab VR Viewer on various standalone devices, providing detailed instructions tailored to each type of device.
Installing and using VR Viewer on Oculus Quest
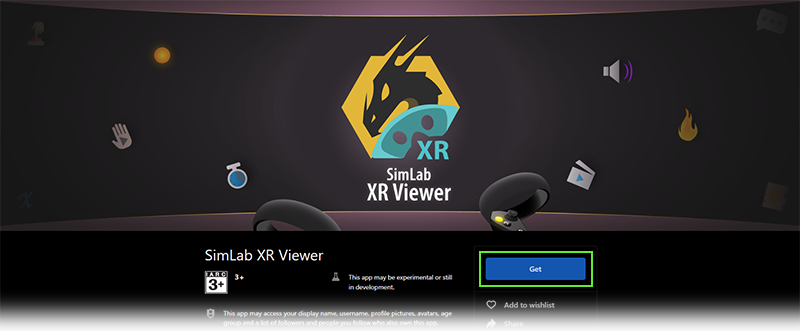
To install SimLab VR Viewer on an Oculus device Click here to go to Meta store and sign in to your Meta account, then click "Get".
Once you have added VR Viewer to your Meta account, you will find the application on your Quest device and can install it and run it.
In SimLab VR Viewer, Sign in using the username and password SimLab Soft has provided you with or you can pair the device with the desktop version of SimLab VR Viewer. (Click here to learn more about pairing).
From this point on, the process is similar to desktop mode where you go to the "Obtained Models" tab and then select the catalog to view its content, and then selecting the desired VR Experience and pressing the VR Button.
Hand Tracking on Oculus Quest
If you are planning on using the controllers with Oculus Quest in standalone mode, the controls are identical to the PC-Mode controls we mentioned earlier, and to learn more about the controls, Run the 1st VR Tutorial Experience that you can find in the "SimLab Models" Tab.
If you want to utilize Hand Gestures then place the controllers somewhere to keep them stationary and position your hands within the Oculus Quest field of vision and it will automatically switch to Hand Tracking and enable Hand gestures, alternatively you can double tap the controllers to each other to switch to the Hand Tracking mode.
you can watch the following Video to learn more about utilizing Hand Tracking within a VR Experience.
Installing and using VR Viewer on Pico
To Install SimLab VR Viewer on Pico 3 and 4, Click here and click on "Get" then select your operating system to download the SimLab Pico Manager.

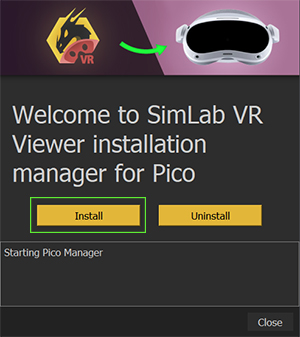
Once the download is complete, install SimLab Pico Manager and run it. Ensure that your Pico device is connected to your computer via a USB port, then click "Install" from the Manager.
Upon successfully installing VR Viewer on your Pico device, run it, and similar to the previously mentioned platforms, sign in with the username or password SimLab soft has provided you with, and then go to the "Obtained Models" tab, and select the available catalog, then the VR Experience you want to run and press the VR Button.
Next : Learn how to navigate and interact with the VR Experience
Interactions and Navigation
Becoming familiar with SimLab VR Viewer controls
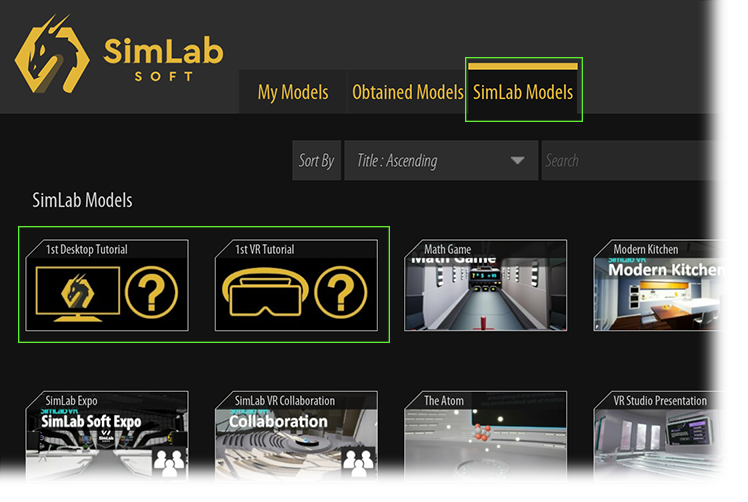
If you're unfamiliar with the navigation and interaction controls in Desktop Mode or VR Mode, simply click on the SimLab Models tab and select the "1st Desktop Tutorial" or "1st VR Tutorial" experiences. These tutorials will guide you through all the necessary steps, enabling you to master the use and operation of the VR experiences.
Note: We recommend watching the demonstration videos for each of your selected trial Medical VR Experiences. This will help you familiarize yourself with the content and ensure a seamless experience.
Next : Purchasing Medical VR Experiences
Purchasing Medical VR Experiences
Medical VR Experiences on the SimLab Store are available for both personal and institutional use. The listed prices on the store apply to personal use, allowing one user per purchase to access the VR Experience. However, institutions and businesses interested in broader access or multiple licenses can contact SimLab directly to explore tailored offerings that better meet their needs.
1. Institutes, Universities and Business
For institutions, universities, schools, and businesses interested in purchasing Medical VR licenses for multiple users or in bundles, please click here to contact SimLab Soft and receive a more convenient and tailored offering that best suits your needs.
2. Personal/Individual use
- Go to SimLab VR Store webpage.
- Click Login in the top right corner.

- Login to your SimLab Account, or click Register if you do not have an existing account to create an account for free.
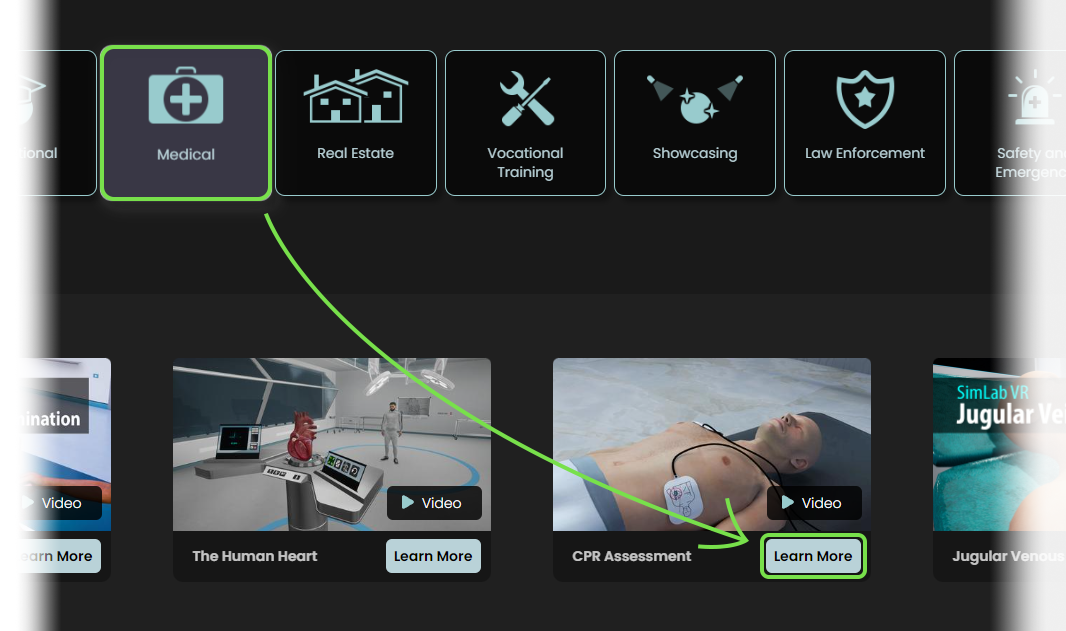
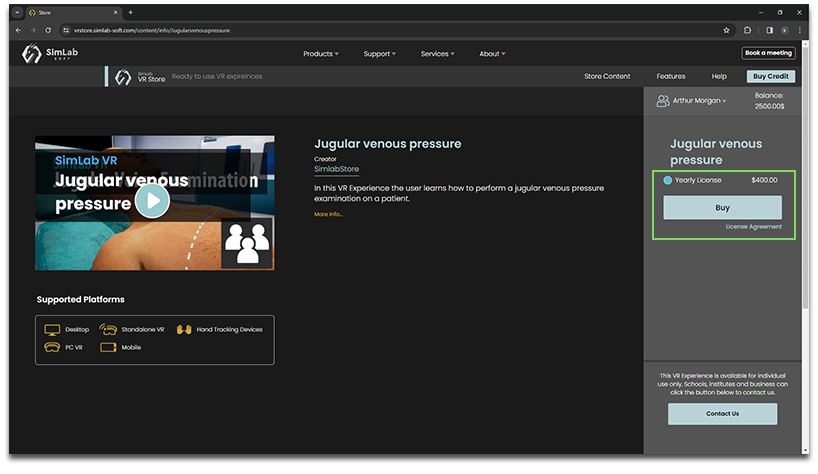
- Click on the medical catalog and click on learn more under the VR Experience you wish to purchase.
- Select a licensing plan and click Buy from the panel to the right.
- To access purchased items, run SimLab VR Viewer and log into your SimLab account, then go to the Obtained Models tab where you can find purchased VR Experiences and those that were shared with you by other users.
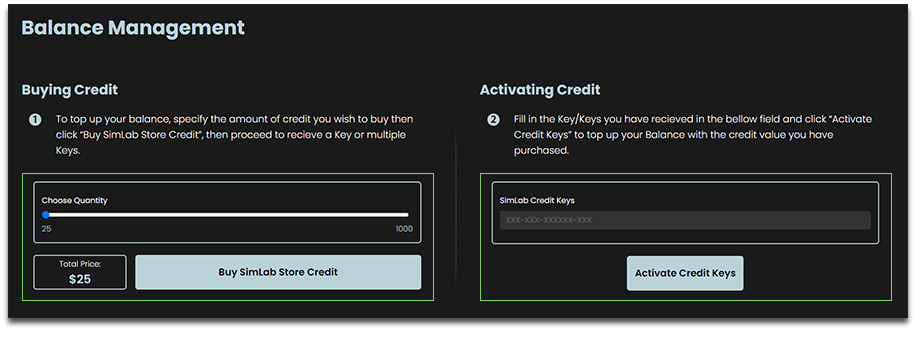
Buying and Adding Credits
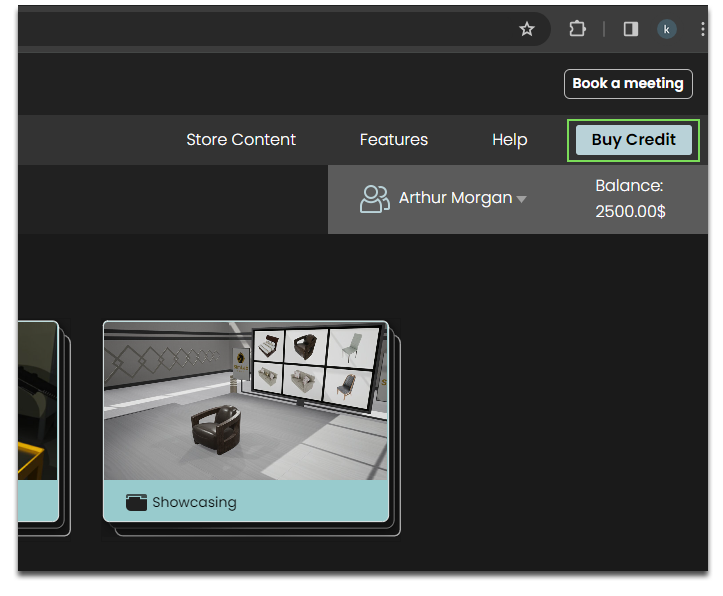
- The easiest method to top up your credit is to click on Buy Credit at the top Right corner to access Balance Management.
- In the Balance Management page, move the slider to determine the amount of credit you wish to purchase, then click on Buy SimLab Store Credit.
- You will receive a key or multiple keys in the amount of credit you have purchased which you need to paste into the Activating Credit field, then you need to click Activate Credit Keys.